When it comes to building a simple front-end project, how do you get started? What are the tools you need? I suspect everyone will have a different answer. Do you start with a (JS or CSS) framework, or off-the-shelf boilerplate? Perhaps you use a task runner (like Gulp to orchestrate your project’s needs. Or do you start simple, with just HTML and a CSS file?
The front-end tooling landscape can be confusing, and at times overwhelming – and when you’re dedicating your time to learning HTML, CSS and Javascript, it feels like yet another thing you need to make time to learn. In this series of articles I want to help developers understand some of the tools and methodologies that have become commonplace for building web projects. Over the next three articles we’ll build a simple project starter (or boilerplate) together. We’ll cover:
An introduction to using NPM scripts (this article) for compiling Sass, running a server and live reloading.
Getting up and running with Parcel, a minimal-config application bundler.
Building out a reusable Sass architecture
Feel free to skip over the parts you’re already familiar with.
Why do we need a project starter repository?
I’ve written previously on this blog about keeping things simple and building dependency-free — and for a basic, minimal site, this approach has a lot to recommend it. But the vast majority of my projects would benefit from a bit more tooling. In any given project, it’s likely that at the very least I’ll want to:
Run a local server
Compile SCSS to CSS, and minify the output
Live reload (show changes in the browser without the need for manual refresh)
Optimise images
Create SVG icon sprites
In larger projects, there are plenty more tooling options we could add into the mix to help us build performant, accessible websites. We might want module bundling, code splitting and transpiling. On the CSS side, perhaps we’d like to inline our critical CSS, or purge unused selectors.
If you don’t know what some of these words mean, you’re not alone! Front-end development has got a lot more complex in recent years, and it can be hard to keep abreast of the constant changes to best practices. One article that has really helped me understand the vast tooling landscape that these days falls into the realm of front-end development is Modern Javascript Explained For Dinosaurs. Although a couple of years old, this article is still extremely relevant, and explains succinctly how Javascript has evolved to become such a vital part of our workflow.
All this takes time to set up and configure, and to do it from scratch every time we start a new project wouldn’t be ideal. Which is why it’s useful to have a starter repository that we can clone or download, with everything we need to start coding straight away.
Choosing our tools
I’m not a person who loves spending time setting up complex tooling. I want my tools to demand as little time from me as possible, so that I can concentrate on the things I love doing! Whilst I’ve used Gulp in the past, it now seems a less necessary part of the toolchain: virtually all dependencies can be installed via NPM and configuring them with NPM scripts is no more difficult than configuring them with Gulp. So using a task runner seems a bit redundant, and would only add an extra dependency to the project.
The tools I’ve chosen here are a personal preference, and suit the kind of projects I like to build. They’re not necessarily everyone’s choice, and there are plenty of different ways to do things. But I hope this tutorial will help you get a bit more familiar with some of the tools that have become popular among developers, so that you can make your own choices.
With that in mind, let’s begin building our project starter, and learn about the tools we’ll be using along the way. Feel free to skip over any parts you’re already familiar with.
Installing Node.js
The very first thing we need to do to get our project set up to work with NPM scripts is to make sure we have Node.js installed globally. This sounds simple enough, but already things start to get a little more complicated when we realise there are a number of different ways to do this:
NVM is my preferred option, as it allows us to easily upgrade our node version, see which version we’re currently running, list other installed versions or switch to another version using single commands. But it requires additional steps to install depending on your setup, which is beyond the scope of this particular article.
Once you have Node installed (by whichever method suits you), you can check the currently installed version by running node -v. (You might want to upgrade to the latest version.) If you’re using NVM you could (optionally) create a .nvmrc config file to ensure you always run the correct Node version for your project.
NPM
Installing Node also installs NPM (Node Package Manager). This is basically a huge library of open source Javascript development tools (or packages) that anyone can publish to. We have direct access to this library of tools and (for better or worse!) can install any of them in our projects.
NPM or Yarn?
Yarn is an alternative package manager, similar to NPM, and almost as popular. In fact, many people consider it an improvement. It can be used in a similar way, to install dependencies. If you prefer to use Yarn over NPM, you can safely substitute NPM commands with the Yarn equivalent anywhere they’re used in this article.
Initialising the project
First, let’s create a new project folder, which we’ll (imaginitively) call new-project. Open the terminal, and inside that folder run:
npm init
Running this command brings up several steps for initialising our project in the command line, such as adding a name and description. You can hit Enter to skip through each of these if you don’t want to complete them right away – we’ll be able to edit them later on. You’ll then see that a package.json file has been created, which should look something like this:
{"name":"project-starter","version":"1.0.0","description":"","main":"index.js","scripts":{"test":"echo \"Error: no test specified\" && exit 1"},"author":"","license":"ISC"}
This file contains all the information about our project, and is where we can edit the details that we just skipped through.
Any packages that we install from NPM will be automatically listed in the package.json file. It’s also where we’ll configure the scripts that will build and run our project. We’ll install some packages and configure these shortly, but first we’ll need a basic project architecture, and some files to work with.
Project structure
We’ll start with a folder structure that looks like this:
We’ve already generated the node_modules directory and package.json in the root of the project. We just need to create a directory called src, containing directories for images, JS, SCSS and icons, plus an index.html file.
Creating our folder structure from the command line
You could create the above folder structure manually, either in your text editor of choice or in your computer’s file system. But if you want to save time, you could do it from the terminal instead. In the root of the project, you could run:
touch index.html
mkdir src && cd src
mkdir js scss images icons
cd ../
Line by line, this code:
Creates a new index.html file
Creates a new src directory and moves us into the newly-created directory
Creates directories inside src called js, scss, images and icons, and a file called index.html.
Brings us back up to the project root.
Now let’s add the following to our index.html file so that we can see our site in the browser:
Now that we have our basic folder structure, we can start to install some packages and write some NPM scripts that will let us build and view our website. The scripts we’re going to write will:
Run a local server
Compile Sass to CSS
Watch for changes and reload the page whenever we update our HTML or CSS
Let’s install the node-sass package from NPM, which compiles .scss files to CSS. In the terminal run:
npm install node-sass --save-dev
Once this command has finished running, you should see a couple of new things:
A directory called node_modules has been created
In the package.json file, node-sass is now listed in “devDependencies”.
Adds a package-lock.json file. This isn’t something we should ever need to touch.
Adding a .gitignore
The node_modules directory is where the code for all of our project dependencies will live. The contents of this folder should not be committed to Github (or your favourite repository host), as installing just a few dependencies could result in hundreds of thousands of files! So the next thing we should do is add a .gitignore file in the project root:
This command creates the .gitignore file and adds node_modules to it. (Again, you can do this manually if you prefer.) Now we are safe in the knowledge that our packages will not be committed.
If we’re not committing these files, then how can we share our dependencies with other users? Well, this down to the package.json file. It tells us the name and version number of any dependencies we have installed. Anyone who clones or forks the project (including us, when we use it to start a new project) can simply run npm install and all the associated dependencies will be fetched and downloaded from NPM.
Types of dependencies
When we installed node-sass we ran the install command with the --save-dev flag. This installs the project as a “dev dependency”. Other packages may not require this command, and save a package under “dependencies” instead. The difference is that regular dependencies are runtime dependencies, whereas dev dependencies are buildtime dependencies. node-sass is required to build your project, so it’s a dev dependency. But something like, say, a carousel plugin, or framework that needs to be downloaded on the client side, (like React) would need to be a regular dependency.
Now we’ll also install Browsersync as a dev dependency. Browsersync will run a local server and reload the browser when our files change.
npm install browser-sync --save-dev
Writing NPM scripts
Now it’s time to write some scripts to run our project. We’re going to write these in the “scripts” section of our package.json.
Sass to CSS
NPM scripts consist of a key (the name of the script, which is what we would type in the terminal in order to run it) and a value – the script itself, which will be executed when we run the command. First we’ll write the script which compiles Sass to CSS. We’ll give it the name scss (we could name it anything we like) and add it to our “scripts” section:
The node-sass package contains some options, some of which we’re defining here. We’re specifying the output style (“compressed”), the output directory (dist/css) and the source directory (src/scss), which is currently empty. Let’s create a source .scss file from the terminal:
touch src/scss/styles.scss
Add a few styles to the newly-created file, then go back to the terminal and run:
npm run scss
You should then see a new directory called dist has been created, containing your compiled CSS. Now, every time you make changes to your styles.scss file, you can run the script and those changes will be compiled.
Live reloading
Our first script is working great, but it’s not very useful yet, as every time we make changes to our code we need to got back to the terminal and run the script again. What we would be much better it to run a local server and see our changes reflected instantaneously in the browser. In order to do that we’ll write a script that uses Browsersync, which we’ve already installed.
First, let’s write the script that runs the server, which we’ll call serve:
In the --files option we’re listing the files that Browsersync should monitor. It will reload the page when any of these change. If we run this script now (npm run serve), it will start a local server and we can preview our web page by going to http://localhost:3000 in the browser.
Watching for changes
Currently we still need to run our scss script when we want to compile our Sass. What we need our scripts to do is:
Watch our src/scss directory for changes.
When a change occurs, compile this to CSS in dist/css.
When dist/css is updated, reload the page.
First we need to install an NPM package called onchange, to watch for changes to the source files:
npm install onchange --save-dev
We can write NPM scripts that run other scripts. Let’s add the script that watches for changes and triggers our scss command to run:
The watch:css script watches for changes using the onchange package (src/scss) and runs our scss script when changes occur.
Combining scripts
Now we need to run two commands in parallel: The serve command to run our server, and the watch:css command to compile our Sass to CSS, which will trigger the page reload. Using NPM scripts we can easily run commands consecutively using the && operator:
"scripts":{/*...*/"start":"npm run serve && npm run scss"}
However, this won’t achieve what we want, as the script will wait until after the serve script has finished running before it begins running the scss script. If we go ahead and write this script, then run it in the terminal (npm start), then npm run scss won’t be triggered until we’ve stopped the server.
To enable us to run commands in parallel, we need to install another package. NPM has several options to choose from. The one I’ve picked is npm-run-all:
npm install npm-run-all --save-dev
The main options in this package (or at least, the ones we care about) are run-s and run-p. The former is for running sequentially, the latter is for running commands in parallel. Once we have installed this package, we can use it to write the script that runs both our serve and watch:css commands in parallel. (We’ll call it start.)
We now have a very basic starter project. We’ve written some scripts that allow us to simply type the command npm start to run a server, watch for changes, compile Sass to CSS and reload the page. An example repository can be found here.
We could now go ahead and install some packages and write scripts to automate some of our other tasks, such as optimising images, creating SVG sprites and uglifying JS. This CSS Tricks article has a great rundown of a few more scripts you might like to add, as well as a starter repository. (Be aware, one or two of the packages included in the example have since been deprecated. You may need to search NPM for substitutes.)
This may serve us perfectly well for small projects, but the more tasks we want to run, the more scripts we’ll need to write, and orchestrating them all becomes more complex. So, in the next article we’ll look at how Parcel, an application bundler, can automate a lot of these tasks for us with minimal configuration, and provide the tooling we need in order to build larger projects.
Walk through the build of a React slider and learn how to implement a parallax hover effect.
Recently I experimented with building a content slider (or carousel, if that’s your fancy) using React. I wanted to create some unique position-based cursor effects when the user hovers over the active slide. This eventually led to the parallax effect you’ll see in the final demo.
This post will dive into the details of the slider’s components, the dynamic CSS variables used for the parallax hover effect, and some of the other properties that brought this project to life.
Component Setup
This React slider consists of three components: Slider, Slide, and SliderControl. The SliderControl houses the button template used for the previous and next arrow controls. The Slider is the parent component that contains the methods for transitioning slides. Inside the Slider render template, an array of slide objects is iterated over and each slide’s data set is returned within a Slide child component using the map() method:
Each of these rendered slides has the following properties:
A unique key (learn more about keys in React here). This key grabs index from the slide’s data.
A slide property equal to the slide object so the component can access that set of data.
The current property grabs the Slider’scurrent state value and controls the previous, current, and next classes being set on each slide.
handleSlideClick points to the Slider method of the same name to update the current value to the clicked slide’s index. This will animate the clicked slide into view.
Updating slide classes
The Slide element has additional classes set based on the current slide.
In the code above, when current equals a slide’s index, that slide becomes active and is given a current class name. Adjacent sibling slides get previous and next class names. By adding these classes to their respective slides, unique hover styles can be applied.
On hover, the cursor changes based on the direction of the slide and that hovered element is pulled towards the current slide along the x-axis. As a result, the user receives some additional visual cues when they are interacting with those neighboring slides.
Slide Parallax Hover Effect
Now for the fun part! The Slide component contains methods that cast parallax magic. The onMouseMove event attribute is using the handleMouseMove method to update the x and y values as the user hovers over the slide. When the cursor is moved off of the slide, onMouseLeave calls handleMouseLeave to reset the x and y values and transition the slide elements back into place.
The x and y coordinates are calculated by finding the user’s cursor in the viewport and where it’s hovering in relation to the center of the slide element. Those coordinate values are assigned to CSS variables (--x and --y) that are then used in transforms to move the child elements around in the slide. In the following pen, click on the “display coordinates” checkbox and hover over the slide to see how the x and y values update to reflect your cursor’s position and movement.
The Parallax CSS
Let’s take a look at the CSS (Sass) being applied to some of these slide elements:
The slide__image-wrapper has overflow: hidden set so that the image can move beyond its wrapper container and hide some of itself beyond the wrapper boundaries. The wrapper container also has a faster transition-duration than the image. Now these elements animate at different speeds. I combined this with some fancy transform calculations and it developed some fluid, independent transitions.
Calculate those transforms
The translate(x, y) values are computed using the CSS calc() function. On the slide__image-wrapper, the --d property (the divisor) is set to 50, which yields a lower coordinate value and less of a push from the slide’s center. Now check out the slide__image transform:
The divisor is changed to 20 on the slide__image so that the x and y values in the transform are higher and will push the image further away from the center of slide. Finally, the formula is multiplied by one pixel so that a unit gets applied to the value. Parallax achieved!
Try playing around with the --d values in the CSS and watch how the transitions change! Edit on Codepen.
Does it seem like the slide headline and button seem to move ever so slightly in the opposite direction of the image? Indeed they do! To achieve this, I multiplied the translate(x, y) calculations by negative pixel values instead:
Check out the Slider component render code in the final demo:
You’ll notice the slider__wrapper element surrounding the slides. This wrapper transitions back and forth along the x-axis as the user interacts with the slider. The values for this transform are set after the current slide’s index is multiplied by the amount of slides divided into 100. I’ve added this in a variable on line 163 to keep the template a little cleaner:
In this example, there are 4 slides. Click the next arrow button or on the second slide (which has an index of 1) and it will pull the wrapper 25% to the left. Click on the third slide (index of 2), do the math (2 x 25), and watch it move the wrapper 50% to the left.
Some other tidbits
These are a few other features I’d like to quickly call out:
If a slide isn’t active, the pointer-events property is set to none. I chose to do this to avoid keyboard tab focusing on buttons inside inactive slides.
The parallax effect is only being applied to the current slide by declaring transforms when the slide--current class is present. Inactive slides have their own animations and shouldn’t have all that fun hover magic that the active slide has.
Images fade in when they are loaded using the imageLoaded method in the Slide component. This helps the initial load of a slide feel smoother instead of its image just popping in. A future iteration of this project will apply lazy loading as well (which is starting to roll out as a native browser feature; very exciting!)
O Node.js é um interpretador de código JavaScript que funciona do lado do servidor. Esta plataforma permite aos programadores o desenvolvimento de aplicações em rede, em tempo real e de alta escalabilidade, de uma forma simples e rápida. O Node.js é baseado no interpretador V8 da Google.
Aprenda a criar uma app CRUD com recurso ao Node.js e MongoDB para registo de smartphones.
O que significa CRUD?
CRUD são as siglas para Create, Read, Update e Delete. Estas são as quatro operações básicas utilizadas em bases de dados relacionais (RDBMS).
A abreviação CRUD mapeada para o padrão ISO/SQL:
Create — INSERT
Read — SELECT
Update — UPDATE
Delete — DELETE
Arquitetura REST
REST — REpresentational State Transfer é um modelo de arquitetura que usa o protocolo HTTP para comunicação. Existem várias representações para apresentar um recurso como, por exemplo, XML, JSON, sendo que este último é o mais usado. Saber mais aqui.
MongoDB
O MongoDB é um novo paradigma no que toca aos conceitos do que são as bases de dados tradicionais, pois este SGBD (sendo uma base de dados NoSQL) guarda todas as informações importantes num único documento, livre de esquemas onde possui ainda identificadores únicos, possibilitando a consulta dos documentos através de métodos avançados de agrupamento e filtragem permitindo com isto redundância e consistência. Saber mais aqui.
Vamos começar…
Para criarem uma app CRUD com Node.js + MongoDB, devem seguir estes passos:
Nota: Vamos considerar uma máquina com Ubuntu como sendo o sistema para este projeto.
Passo 1) Instalar o Node.js no Ubuntu e derivado
A instalação do Node.js é relativamente simples. Para tal basta abrir o terminal e executar os seguintes comandos:
sudo apt-get update
sudo apt-get install nodejs
Passo 2) Criar diretório para projeto
mkdir smartphones_app
Passo 3) Iniciar Projeto
Para iniciar o projeto deve executar o comando:
npm init
Indiquem os dados solicitados para a criação do ficheiro package.json. Este ficheiro guarda informações sobre o projeto e também sobre as dependências (pacotes) do mesmo.
Passo 4) Instalação dos pacotes necessários
Para este projeto vamos precisar de instalar os módulos:
Express.js — uma framework para Node que permite o desenvolvimento de aplicações web de uma forma muito simples body-parser — pacote que pode ser usado para manipular solicitações JSON. mongoose – Base de Dados de suporte ao projeto
Para instalar estes pacotes podem usar o comando:
npm install --save express body-parser mongoose
Passo 5) Criar servidor (com Node.js)
Para começar vamos criar o ficheiro index.js (indicado no package.json)
touch index.js
Dentro do nosso ficheiro associamos as dependências instaladas anteriormente (Express.js e body-parser) e inicializamos a app.
O próximo passo é indicar o porto lógico que ficará associado ao servidor criado pelo Node.js. Vamos considerar o porto 8000.
let porto = 8000;
app.listen(porto, () => {
    console.log('Servidor em execução no porto' + porto);
});
Para colocar em execução o servidor devem usar o comando:
node index.js
E está feito! Agora vamos criar toda a estrutura de aplicação, definindo as Routes, os Controllers e o Modelo.
Organização da Aplicação (MVC)
A nossa aplicação deverá seguir o “design” MVC. M de Model (código para o nosso modelo de base de dados), V de View (layout) e C de controllers (parte lógica da app (Como a app lida com as solicitações recebidas e as respostas enviadas).
Existem também as Routes que indicam ao cliente (browser ou app mobile) qual o controller a usar, de acordo com o url/path solicitado.
Dentro da nossa pasta smartphones_app vamos então criar a seguinte estrutura (podem usar o comando mkdir -p controllers models routes views)
controllers
models
routes
views
Criar Modelo
Vamos começar por definir o nosso MODEL. Para isso vamos criar, dentro do diretório models, um ficheiro com o nome smartphones.model.js
Ao exportarmos o nosso modelo, podemos usá-lo em outros ficheiros do projeto. Com isto temos a parte M do design MVC concluída!
Criar Routes
Vamos criar, dentro do diretório routes, um ficheiro com o nome smartphones.route.js e colocar o seguinte código:
const express = require(‘express’);
const router = express.Router();
// Colocar controller que ainda não foi criado
const smartphone_controller = require(‘../controllers/smartphone.controller’);
// teste simples
router.get(‘/testar’, smartphone_controller.test);
module.exports = router;
Criar Controllers
const Smartphone = require('../models/smartphones.model');
exports.test = function (req, res) {
    res.send('Olá! Teste ao Controller');
};
Vamos agora ao ficheiro principal (index.js) e adicionar a route.
const express = require('express');
const bodyParser = require('body-parser');
const smartphone = require('./routes/smartphones.route'); // Importa rota
const app = express();
app.use('/smartphones', smartphones);

let porto = 8000;
app.listen(porto, () => {
    console.log('Servidor em execução no porto' + porto);
});
Testar
Para testarem basta usar o endereço localhost:8000/smartphones/testar (definido na Route). Se o resultado for o seguinte, então a sua primeira Route está a funcionar.
De seguida, vamos criar a base de dados e ligar o projeto à base de dados.
Base de Dados MongoDB no mLab
Para a Base de Dados de suporte ao nosso projecto vamos usar o mongoDB, recorrendo ao serviço mLab. O MongoDB é um novo paradigma no que toca aos conceitos do que são as bases de dados tradicionais, pois este SGBD (sendo uma base de dados NoSQL) guarda todas as informações importantes num único documento, livre de esquemas onde possui ainda identificadores únicos, possibilitando a consulta dos documentos através de métodos avançados de agrupamento e filtragem permitindo com isto redundância e consistência.
O mLab é um Database-as-a-Service quem tem atualmente mais de meio milhão de bases de dados. Com este serviço pode guartar até 500 MB de dados, gratuitamente.
Criar Base de Dados
Para começar devem criar uma conta aqui. Em seguida criem uma Base de Dados carregando em Create New
Em seguida indiquem o Cloud Provider e o tipo de Plano (Plan Type) e carreguem em Continue.
Escolham em que DataCenter da Google pretendem guardar os vossos dados. Para seguir carreguem em Continue.
Indiquem agora um nome para a vossa Base de Dados MongoDB
Em seguida é solicitado para confirmarem o plano que indicaram e, se tudo tiver sido corretamente configurado, a Base de Dados definida será criada.
Criar Utilizadores
O próximo passo é criar um utilizador para acesso à Base de Dados. Para isso entrem na base de dados criada e em seguida escolha a opção Add database user.
Preencham agora os dados solicitados para a criação de um utilizador.
E está tudo ao nível da criação da base de dados.
Para finalizar esta app, seguir o resto dos processos aqui.
O MySQL é, muito provavelmente, o sistema de gestão de base de dados (SGBD) mais usado em todo o mundo, estando disponível em várias versões e para diferentes sistemas operativos. Por outro lado o MariaDB (fork do MySQL) tem tido um crescimento fantástico.
Hoje deixamos 6 dicas de segurança para quem usa o MySQL ou o MariaDB.
Por omissão, depois de instalar o MySQL/MariaDB, a segurança dos serviços não é totalmente garantida. Nesse sentido é preciso realizar alguns ajustes importantes. Aqui ficam as nossas dicas para hoje:
Dica 1 – “Instalação” segura do MySQL
Depois de instalar o MySQL/MariaDB devem executar o script mysql_secure_installation para:
Definir uma password para o utilizador root
Remover bases de dados de testes
Remover utilizadores anónimos
Não permitir o acesso remoto ao gestor de base de dados
etc.
Durante a configuração, devem seguir os seguintes passos:
Enter current password for root (enter for none): # DAR ENTER #
Set root password? [Y/n] # DAR ENTER #
New password: # Redefinir Password #
Re-enter new password: # Redefinir Password #
Remove anonymous users? [Y/n] Y
Disallow root login remotely? [Y/n] Y
Remove test database and access to it? [Y/n] Y
Reload privilege tables now? [Y/n] Y
Dica 2 – Permitir apenas o acesso local
Se não usar o script anterior para bloquear o acesso remoto à base de dados, pode fazê-lo através do ficheiro /etc/mysql/mariadb.conf.d/50-server.cnf adicionando, a seguir à secção mysql, o comando:
bind-address = 127.0.0.1
Nota: Caso pretenda definir esta alteração no MySQL, deve ser no ficheiro /etc/mysql/mysql.conf.d/mysql.cnf.
Dica 3 – Mudar o porto de ligação ao MySQL/MariaDB
Por omissão, o porto de ligação ao MySQL/MariaDB é o conhecido 3306. Para mudarem, por exemplo, para 5555, devem ir ao ficheiro /etc/mysql/mariadb.conf.d/50-server.cnf e mudar a variável port.
Dica 4 – Apagar comandos MySQL
Todos os comandos executados na shell do MySQL/MariaDB são guardados no ficheiro ~/.mysql_history.
Para apagar toda a informação desse ficheiro devem usar o comando:
cat /dev/null > ~/.mysql_history
Dica 5 – Mude frequentemente a password de acesso ao MySQL/MariaDB
Para mudar com frequência a password de acesso ao gestor de base de dados basta que use os seguintes comandos:
MariaDB [(none)]> USE mysql;
MariaDB [(none)]> UPDATE user SET password=PASSWORD('YourPasswordHere') WHERE User='root' AND Host = 'localhost';
MariaDB [(none)]> FLUSH PRIVILEGES;
Hoje em dia qualquer editor de texto oferece um vasto conjunto de funcionalidades. Este tipo de ferramenta pode ser usada nas mais diversas tarefas que vão desde a programação, registo de texto simples, ajuda na configuração de serviços, listagem de ações, etc.
Hoje apresentamos um TOP 10 dos melhores editores de texto em 2017. Veja se falta algum.
O Notepad++ é um poderosíssimo editor de texto que combina uma série de funcionalidades que facilitam o trabalho de qualquer pessoa que trabalhe com texto digital. É bastante leve, reconhece a sintaxe de aproximadamente 40 linguagens de programação (C, C++, HTML, XML, ASP, JAVA, SQL, Perl, Python, HTML5, CSS entre outras com sistema syntax highlight, excelente para programadores).
O Atom, o popular editor de código do Github, é um dos preferidos dos programadores devido às funcionalidades que oferece. O Atom permite que os programadores acedam à semântica de várias linguagens de programação, à integração com o Git e (claro) com o próprio Github, a temas completamente personalizáveis e o acesso a uma comunidade que está a desenvolver e a criar módulos e extensões para o Atom.
Sublime Text é um editor de texto e código-fonte multiplataforma, escrito em linguagem C++, que foi inicialmente pensado para ser uma extensão do vim. Este editor oferece recursos extraordinários e um desempenho simplesmente surpreendente.
Considerado como o substituto do gedit (editor de texto com interface gráfica), o Brackets é um editor de texto código, muito versátil, leve e pode ser facilmente artilhado através das mais diversas extensões disponíveis.
Bluefish é um poderoso editor de texto, recomendado para programadores e webdesigners. Como muitas opções disponíveis, permite desenvolvimento em HTML, XHTML, CSS, XML, XML, PHP, C, Javascript, Java, SQL, Perl, JSP, Python, entre outros.
O Bluefish foi criado por Chris Mazuc e Olivier Sessink em 1997, com o objetivo de facilitar o desenvolvimento web a profissionais tivessem como sistema operativo o Linux.
7# Light Table
Light Table é considerado um editor de texto altamente moderno e inovador. Este editor pode ser facilmente personalizado, podemos embeber gráficos e ver em tempo real o resultado de um determinado código. Vale a pena experimentar.
O Vim é um dos principais editores de texto do GNU/Linux. São fantásticas as suas capacidades e por isso é um dos eleitos pela maioria dos utilizadores. A interface não é muito amigável e no principio é difícil dominar o editor.
Tal como o Sublime Text, o UltraEdit é também um editor muito completo em termos de funcionalidades. Este editor pode ser facilmente personalizado e até podemos configurar ligações FTP, SSH, Telnet para trabalhar em código que está do lado do servidor.
Uma das ferramentas mais usadas em qualquer sistema GNU/Linux é sem dúvida o editor de texto. Ao nível da linha de comandos são várias as opções mas um dos mais populares é sem dúvida o nano.
E são estes alguns dos bons editores de texto que existem hoje no mercado. Os primeiros que apresentamos são os mais completos e por isso são também dos mais populares.
HTTPS is a must for every website nowadays: Users are looking for the padlock when providing their details; Chrome and Firefox explicitly mark websites that provide forms on pages without HTTPS as being non-secure; it is an SEO ranking factor; and it has a serious impact on privacy in general. Additionally, there is now more than one option to get an HTTPS certificate for free, so switching to HTTPS is only a matter of will.
HTTPS is a must for every website nowadays: Users are looking for the padlock when providing their details; Chrome and Firefoxexplicitly mark websites that provide forms on pages without HTTPS as being non-secure; it is an SEO ranking factor; and it has a serious impact on privacy in general. Additionally, there is now more than one option to get an HTTPS certificate for free, so switching to HTTPS is only a matter of will.
Setting up HTTPS can be a bit intimidating for the inexperienced user — it takes many steps with different parties, it requires specific knowledge of encryption and server configuration, and it sounds complicated in general.
In this guide, I will explain the individual components and steps and will clearly cover the individual stages of the setup. Your experience should be easy, especially if your hosting provider also supplies HTTPS certificates — chances are you will be able to perform everything from your control panel quickly and easily.
I have included detailed instructions for owners of shared hosting plans on cPanel, administrators of Apache HTTP servers and of nginx on Linux and Unix, as well as Internet Information Server on Windows.
HTTP Vs. HTTPS Vs. HTTP/2 Vs. SSL Vs. TLS: What’s What? Link
A lot of acronyms are used to describe the processes of communication between a client and a server. These are often mixed up by people who are not familiar with the internals.
The Hypertext Transfer Protocol (HTTP) is the basic communication protocol that both clients and servers must implement in order to be able to communicate. It covers things such as requests and responses, sessions, caching, authentication and more. Work on the protocol, as well as on the Hypertext Markup Language (HTML), started in 1989 by Sir Tim Berners-Lee and his team at CERN. The first official version of the protocol (HTTP 1.0) was released in 1996, shortly followed by the currently widely adopted version (HTTP 1.1) in 1997.
The protocol transfers information between the browser and the server in clear text, allowing the network, through which the information passes, to see the information transmitted. This is a security concern, so HTTP Secure (HTTPS) was introduced, allowing the client and the server to first establish an encrypted communication channel, and then pass the clear text HTTP messages through it, effectively protecting them from eavesdropping.
The encrypted channel is created using the Transport Layer Security (TLS) protocol, previously called Secure Socket Layer (SSL). The terms SSL and TLS are often used interchangeably, with SSL 3.0 being replaced by TLS 1.0. SSL was a Netscape-developed protocol, while TLS is an IETF standard. At the time of writing, all versions of SSL (1.0, 2.0, 3.0) are deprecated due to various security problems and will produce warnings in current browsers, and the TLS versions (1.0, 1.1, 1.2) are in use, with 1.3 currently a draft.
So, sometime around 1996 and 1997, we got the current stable version of the Internet (HTTP 1.1, with or without SSL and TLS), which still powers the majority of websites today. Previously, HTTP was used for non-sensitive traffic (for example, reading the news), and HTTPS was used for sensitive traffic (for example, authentication and e-commerce); however, increased focus on privacy means that web browsers such as Google Chrome now mark HTTP websites as “not private” and will introduce warnings for HTTP in future.
The next upgrade of the HTTP protocol — HTTP/2 — which is being adopted by a growing number of websites, adds new features (compression, multiplexing, prioritization) in order to reduce latency and increase performance and security.
In HTTP version 1.1, the secure connection is optional (you may have HTTP and/or HTTPS independent of each other), while in HTTP/2 it is practically mandatory — even though the standard defines HTTP/2 with or without TLS, most browser vendors have stated that they will only implement support for HTTP/2 over TLS.
Why bother with HTTPS in the first place? It is used for three main reasons:
Confidentiality
This protects the communication between two parties from others within a public medium such as the Internet. For example, without HTTPS, someone running a Wi-Fi access point could see private information such as credit cards when someone using the access point purchases something online.
Integrity
This makes sure information reaches its destined party in full and unaltered. For example, our Wi-Fi friend could add extra advertisements to our website, reduce the quality of our images to save bandwidth or change the content of articles we read. HTTPS ensures that the website can’t be modified.
Authentication
This ensures that the website is actually what it claims to be. For example, that same person running the Wi-Fi access point could send browsers to a fake website. HTTPS ensures that a website that says it’s example.com is actually example.com. Some certificates even check the legal identity behind that website, so that you know yourbank.com is YourBank, Inc.
Confidentiality, integrity and authentication aren’t HTTPS-specific: They’re the core concepts of cryptography. Let’s look a little more closely at them.
Confidentiality is privacy — that is, it protects information from being read by an unauthorized third party. The process usually involves turning a readable (i.e. audible and visible) form of the information, called plaintext, into a scrambled, unreadable version, called ciphertext. This process is called encryption. The reverse process — turning the unreadable ciphertext back into readable plaintext — is called decryption. There are many methods — cipher functions (or algorithms) — to encrypt and decrypt information.
In order for two parties to be able to communicate, they should agree on two things:
which algorithm (cipher function) they will use in their communication;
which parameters, password or rules (i.e. secret) will be used with the method selected.
There are two main types of encryption methods:
symmetric
Both parties share a common secret key.
asymmetric
One of the parties has a pair of a secret and a public key, the foundation of public key infrastructure (PKI).
The symmetric class of methods relies on both parties having a shared secret, which the sender uses to encrypt the information, which in turn the receiver decrypts using the same method and key (see the figure below). The problem with these methods is how both parties will negotiate (i.e. exchange) the secret without physically meeting each other — they need to have a secure communication channel of some sort.
The asymmetric methods come to solve this kind of problem — they are based on the notion of public and private keys. The plaintext is encrypted using one of the keys and can only be decrypted using the other complementary key.
So, how does it work? Let’s assume we have two parties who are willing to communicate with each other securely — Alice and Bob (these are always the names of the fictional characters in every tutorial, security manual and the like, so we’ll honor the tradition here as well). Both of them have a pair of keys: a private key and a public one. Private keys are known only to their respective owner; public keys are available to anyone.
If Alice wants to send a message to Bob, she would obtain his public key, encrypt the plaintext and send him the ciphertext. He would then use his own private key to decrypt it.
If Bob would like to send a reply to Alice, he would obtain her public key, encrypt the plaintext and send her the ciphertext. She would then use her own private key to decrypt it.
When do we use symmetric and when do we use asymmetric encryption? Asymmetric encryption is used to exchange the secret between the client and the server. In real life, we usually do not need two-way asymmetric communication — it is sufficient if one of the parties (we’ll just call it a server, for the sake of simplicity) has the set of keys, so it can receive an encrypted message. It really protects the security of information in only one direction — from the client to the server, because the information encrypted with the public key can only be decrypted using the private key; hence, only the server can decrypt it. The other direction is not protected — information encrypted with the server’s private key can be decrypted with its public key by anyone. The other party (we’ll similarly call it a client) begins the communication by encrypting a randomly generated session secret with the server’s public key, then sends the ciphertext back to the server, which, in turn, decrypts it using its own private key, now having the secret.
Symmetric encryption is then used to protect the actual data in transit, since it’s much faster than asymmetric encryption. The two parties (the client and the server), with the previously exchanged secret, are the only ones able to encrypt and decrypt the information.
That’s why the first asymmetric part of the handshake is also known (and referred to) as key exchange and why the actual encrypted communication uses algorithms known (and referred to) as cipher methods.
Another concern, solved with HTTPS, is data integrity: (1) whether the entire information arrived successfully, and (2) whether it was modified by someone in transit. In order to ensure the information is transmitted successfully, message digest algorithms are used. Computing message authentication codes (MACs) for each message exchanged are a cryptographic hashing process. For example, obtaining a MAC (sometimes called a tag) uses a method that ensures that it is practically impossible (the term commonly used is infeasible) to:
change the message without affecting the tag,
generate the same tag from two different messages,
reverse the process and obtain the original message from the tag.
What about authentication? The problem with the real-life application of the public key infrastructure is that both parties have no way of knowing who the other party really is — they are physically separate. In order to prove the identity of the other party, a mutually trusted third party — a certificate authority (CA) — is involved. A CA issues a certificate, stating that the domain name example.com (a unique identifier), is associated with the public key XXX. In some cases (with EV and OV certificates — see below), the CA will also check that a particular company controls that domain. This information is guaranteed by (i.e. certified by) the certificate authority X, and this guarantee is valid no earlier than (i.e. begins on) date Y and no later than (i.e. expires on) date Z. All of this information goes into a single document, called an HTTPS certificate. To present an easily understandable analogy, it is like a country government (a third party trusted by all) issuing an ID or a passport (a certificate) to a person — every party that trusts the government would also accept the identity of the ID holder (assuming the ID is not fake, of course, but that’s outside the scope of this example).
Certification authorities (CAs) are organizations trusted to sign certificates. Operating systems, such as Windows, macOS, iOS and Android, as well as the Firefox browser, have a list of trusted certificates.
You can check which CAs are trusted by your browser:
Mac
“Applications” → “Utilities” → “Keychain Access.” Under “Category,” pick Certificates”
All certificates are then checked and trusted — by the operating system or browser if directly trusted or by a trusted entity if verified. This mechanism of transitive trust is known as a chain of trust:
You can add other unlisted CAs, which is useful when working with self-signed certificates (which we’ll discuss later).
In most common situations, only the server needs to be known to the client — for example, an e-commerce website to its customers — so, only the website needs a certificate. In other situations, such as e-government systems, both the server and the client, requesting a service, should have their identity proven. This means that both parties should be using certificates to authenticate to the other party. This setup is also outside the scope of this article.
Domain validated (DV)
The most common type of certificate, a DV certificate verifies that the domain matches a particular public key. The browser establishes a secure connection with the server and displays the closed padlock sign. Clicking the sign will show “This website does not supply ownership information.” There are no special requirements other than having a domain — a DV certificate simply ensures that this is the correct public key for that domain. The browser does not show a legal entity. DV certificates are often cheap (10 USD per year) or free — see the sections on Let’s Encrypt and Cloudflare below.
Extended validation (EV)
EV certificates verify the legal organization behind a website. This is the most trustworthy type of certificate, which is obtained after a CA checks the legal entity that controls the domain. The legal entity is checked with a combination of:
control of the domain (such as a DV certificate);
government business records, to make sure the company is registered and active;
independent business directories, such as Dunn and Bradstreet, Salesforce’s connect.data.com, Yellow Pages, etc.;
a verification phone call;
inspection of all domain names in the certificate (wildcards are explicitly forbidden for EV certificates).
As well as the closed padlock sign, EV HTTPS certificates display the name of the validated legal entity — typically a registered company — before the URL. Some devices, such as iOS Safari, will only show the validated legal entity, ignoring the URL completely. Clicking the sign will show details about the organization, such as the name and street address. The cost is between 150 and 300 USD per year.
Organization validated (OV)
Like EV, OV certificates verify the legal organization behind a website. However, unlike EV, OV HTTPS certificates do not display the verified legal name in the UI. As a result, OV certificates are less popular, because they have high validation requirements, without the benefits of these being shown to users. Prices are in the 40 to 100 USD per year range.
Once upon a time, HTTPS certificates generally contained a single domain in the CN field. Later, the “subject alternative name” (SAN) field was added to allow additional domains to be covered by a single certificate. These days, all HTTPS certificates are created equal: Even a single-domain certificate will have a SAN for that single domain (and a second SAN for the www version of that domain). However, many certificate vendors still sell single- and multi-domain HTTPS certificates for historical reasons.
Single domain
This is the most common type of certificate, valid for the domain names example.com and www.example.com.
Multiple domains (UCC/SAN)
This type of certificate, also known as Unified Communications Certificate (UCC) or Subject Alternative Names (SAN) certificate, can cover a list of domains (up to a certain limit). It is not limited to a single domain — you can mix different domains and subdomains. The price usually includes a set number of domains (three to five), with the option to include more (up to the limit) for an additional fee. Using it with related websites is advised, because the client inspecting the certificate of any of the websites will see the main domain, as well as all additional ones.
Wildcard
This type of certificate covers the main domain as well as an unlimited number of subdomains (*.example.com) — for example, example.com, www.example.com, mail.example.com, ftp.example.com, etc. The limitation is that it covers only subdomains of the main domain.
The variety of HTTPS certificates available is summarized in the table below:
CERTIFICATE TYPE
DOMAIN VALIDATED (DV)
ORGANIZATION VALIDATED (OV)
HTTPS
HTTPS
Verified legal owner
Single domain
example.com, www.example.com
Multiple domains
example.com, www.example.com, mail.example.com, example.net, example.org, etc.
predefined list, up to a certain limit (usually 100)
Wildcard
*.example.com
matches any subdomain
N/A — all names must be included explicitly in the certificate and inspected by the CA.
To recap, four components of HTTPS require encryption:
The initial key exchange
This uses asymmetric (private and public key) algorithms.
The identity certification (the HTTPS certificate, issued by a certification authority)
This uses asymmetric (private and public key) algorithms.
The actual message encryption
This uses symmetric (pre-shared secret) algorithms.
The message digesting
This uses cryptographic hashing algorithms.
Each of these components has a set of used algorithms (some of them deprecated already) that use different key sizes. Part of the handshake involves the client and the server agreeing on which combination of methods they will use — select one out of about a dozen public key (key exchange) algorithms, one out of about a dozen symmetric key (cipher) algorithms and one out of three (two deprecated) message-digesting (hashing) algorithms, which gives us hundreds of combinations.
For example, the setting ECDHE-RSA-AES256-GCM-SHA384 means that the key will be exchanged using the Elliptic Curve Diffie-Hellman Ephemeral (ECDHE) key exchange algorithm; the CA signed the certificate using the Rivest-Shamir-Adleman (RSA) algorithm; the symmetric message encryption will use the Advanced Encryption Standard (AES) cipher, with a 256-bit key and GCM mode of operation; and message integrity will be verified using the SHA secure hashing algorithm, using 384-bit digests. (A comprehensive list of algorithm combinations is available.)
So, there are some configuration choices to be made.
Deciding the cipher suites to use is a balance between compatibility and security:
Compatibility with older browsers needs the server to support older cipher suites.
However, many older cipher suites are no longer considered secure.
OpenSSL lists the supported combinations (see above) in order of cryptographic strength, with the most secure at the top and the weakest at the bottom. It is designed in this way because, during the initial handshake between the client and the server, the combination to be used is negotiated until a match is found that is supported by both parties. It makes sense to first try the most secure combinations and gradually resort to weaker security only if there is no other way.
Wikipedia has a comprehensive list of algorithms for all components of TLS and their support in different versions of SSL and TLS.
A very useful and highly recommended resource, advising on what cryptographic methods to enable on the server, is the Mozilla SSL Configuration Generator, which we’ll use later on with actual server configurations.
Elliptic Curve Cryptography (ECC) certificates are faster and use less CPU than the RSA certificates, which is particularly important for mobile clients. However, some services, such as Amazon, CloudFront and Heroku, don’t yet, at the time of writing, support ECC certificates.
A 256-bit ECC key is considered sufficient.
Rivest Shamir Adleman (RSA) certificates are slower but compatible with a wider variety of older servers. RSA keys are larger, so a 2048-bit RSA key is considered minimal. RSA certificates of 4096 and above may hurt performance — they’re also likely to be signed by a 2048-bit intermediary, undermining much of the additional security!
You might have noticed the fluidity of the statements above and the lack of any numbers — it is because what is a heavy load on one server is not on another. The best way to determine the impact on performance is to monitor the load on your server, with your real website(s) and your real visitors. And even that will change over time.
To obtain an HTTPS certificate, perform the following steps:
Create a private and public key pair, and prepare a Certificate Signing Request (CSR), including information about the organization and the public key.
Contact a certification authority and request an HTTPS certificate, based on the CSR.
Obtain the signed HTTPS certificate and install it on your web server.
There exists a set of files, containing different components of the public key infrastructure (PKI): the private and public keys, the CSR and the signed HTTPS certificate. To make things even more complicated, different parties use different names (and file extensions) to identify one and the same thing.
To start, there are two popular formats for storing the information — DER and PEM. The first one (DER) is binary, and the second (PEM) is a base64-encoded (text) DER file. By default, Windows uses the DER format directly, and the open-source world (Linux and UNIX) uses the PEM-format. There are tools (OpenSSL) to convert between one and the other.
The files we’ll be using as examples in the process are the following:
example.com.key
This PEM-formatted file contains the private key. The extension .key is not a standard, so some might use it and others might not. It is to be protected and accessible only by the system super-user.
example.com.pub
This PEM-formatted file contains the public key. You do not actually need this file (and it’s never explicitly present), because it can be generated from the private key. It is only included here for illustration purposes.
example.com.csr
This is a certificate signing request. A PEM-formatted file containing organizational information, as well as the server’s public key, should be sent to the certification authority issuing the HTTPS certificate.
example.com.crt
This HTTPS certificate is signed by the certification authority. It is a PEM-formatted file, including the server’s public key, organizational information, the CA signature, validity and expiry dates, etc. The extension .crt is not a standard; other common extensions include .cert and .cer.
File names (and extensions) are not standard; they can be anything you like. I have chosen this naming convention because I think it is illustrative and makes more obvious which component has what function. You can use whatever naming convention makes sense to you, as long as you refer to the appropriate key-certificate files in the commands and server configuration files throughout the process.
The private key is a randomly generated string of a certain length (we’ll use 2048-bit), which looks like the following:
This particular CSR contains the server’s public key and details about the organization ACME Inc., based in London, UK, and which owns the domain name example.com.
Finally, the signed HTTPS certificate looks like the following:
All parts are connected and should match each other. The final certificate was generated for illustration purposes only — it is the so-called self-signed certificate, because it was not signed by a recognized certification authority.
The process will be illustrated with actual steps for cPanel, Linux, FreeBSD and Windows. This is a universal process, valid for all kinds of certificates. If you are interested in getting a free DV certificate, there are other procedures to follow in the sections on Let’s Encrypt and Cloudflare.
Step 1: Create A Private Key And A Certificate Signing Request (CSR) Link
In the following examples, we’ll use 2048-bit RSA certificates, for their wide compatibility. If your server provider supports it (for example, if you don’t use Heroku or AWS), you might prefer to use ECC instead.
Scroll down to the “Security” section and click “SSL/TLS.” cPanel “Security” section (View large version)
You are now in the “SSL/TLS Manager” home. Click “Private Keys (KEY)” to create a new private key. cPanel “SSL/TLS Manager (View large version)
You will be redirected to a page to “Generate, Paste or Upload a new “Private
Key.” Select “2048-bit” in the “Key Size” dropdown, and click “Generate.”
cPanel “Private Key” management (View large version)
The new private key will be generated, and you will get a confirmation screen: cPanel private key confirmation (View large version)
If you go back to the “Private Keys” home, you will see your new key listed: cPanel “Private Keys” with the new key generated (View large version)
Go back to the “SSL/TLS Manager” home. Click “Certificate Signing Requests (CSR)” to create a new certificate request. cPanel “SSL/TLS Manager” (View large version)
You will now be presented with the “Generate Service Request” form. Select the previously created private key and fill in the fields. Answer all of the questions correctly (they will be public in your signed certificate!), paying special attention to the “Domains” section, which should exactly match the domain name for which you are requesting the HTTPS certificate. Include the top-level domain only (example.com); the CA will usually add the wwwsubdomain as well (i.e. www.example.com). When finished, click the “Generate” button. cPanel “Create New Certificate Signing Request” form (View large version)
The new CSR will be generated, and you will get a confirmation screen: cPanel CSR confirmation (View large version)
If you go back to the “Certificate Signing Request” home, you will see your new CSR listed: cPanel “Certificate Signing Request” with the new CSR generated (View large version)
The private key will be generated, and you will be asked some information for the CSR:
Generating a 2048 bit RSA private key
........................+++
................................................................+++
writing new private key to 'example.com.key'
-----
You are about to be asked to enter information that will be incorporated
into your certificate request.
What you are about to enter is what is called a Distinguished Name or a DN.
There are quite a few fields but you can leave some blank
For some fields there will be a default value,
If you enter ‘.', the field will be left blank.
Answer all questions correctly (they will be public in your signed certificate!), paying special attention to the “Common Name” section (for example, server FQDN or YOUR name), which should exactly match the domain name for which you are requesting the HTTPS certificate. Include the top-level domain only (example.com), the CA will usually add the www subdomain as well (i.e. www.example.com):
Country Name (2 letter code)[AU]:GB
State or Province Name (full name)[Some-State]:London
Locality Name (eg, city)[]:London
Organization Name (eg, company)[Internet Widgits Pty Ltd]:ACME Inc.
Organizational Unit Name (eg, section)[]:IT
Common Name (e.g. server FQDN or YOUR name)[]:example.com
Email Address []:admin@example.com
Please enter the following 'extra' attributes
to be sent with your certificate request
A challenge password []:
An optional company name []:
Open “Start” → “Administrative Tools” → “Internet Information Services (IIS) Manager.” Click the server name. Double-click “Server Certificates” in the middle column: Open “Internet Information Services (IIS) Manager.” Double-click “Server Certificates.” (View large version)
Click “Create Certificate Request” in the right column. Click “Create Certificate Request” in the right column. (View large version)
Enter your organization’s details, paying special attention to “Common
Name,” which should match your domain name. Click “Next.”
Enter your organization’s details. (View large version)
Leave the default “Cryptographic Service Provider.” Set the “Bit length” to 2048. Click “Next.” Set the “Bit length” to 2048. (View large version)
Browse for a place to save the generated CSR and click “Finish.” Browse for a place to save the generated CSR and click ‘Finish’. (View large version)
In order to get your website certificate, first purchase a HTTPS certificate credit of a chosen type (DV, OV, EV, single site, multisite, wildcard — see above) from an HTTPS certificate provider. Once the process is complete, you will have to provide the certificate signing request, which will spend the purchased credit for your chosen domain. You’ll be asked to provide (i.e. to paste in a field or to upload) the whole CSR text, including the -----BEGIN CERTIFICATE REQUEST----- and -----END CERTIFICATE REQUEST----- lines. If you would like to have an EV or OV certificate, you’ll need to provide the legal entity for which you’re requesting the certificate — you might also be asked to provide additional documents to confirm that you represent this company. The certificate registrar will then verify your request (and any supporting documents) and issue the signed HTTPS certificate.
Your hosting provider or HTTPS registrar might have a different product and registration procedure, but the general logic should be similar.
Find an HTTPS certificate vendor.
Select a type of certificate (DV, OV, EV, single site, multisite, wildcard), and click “Add to cart.” Specify your preferred payment method and complete the payment.
Activate the new HTTPS certificate for your domain. You can either paste or upload the certificate signing request. The system will extract the certificate details from the CSR.
You will be asked to select a method of “Domain Control Validation” — whether by email, uploading an HTML file (HTTP-based) or adding a TXTrecord to your domain zone file (DNS-based). Follow the instructions for your DCV method of choice to validate.
Wait several minutes until the validation is performed and the HTTPS certificate is issued. Download the signed HTTPS certificate.
It is also possible to sign a certificate yourself, rather than have a certificate authority do it. This is good for testing purposes because it will be cryptographically as good as any other certificate, but it will not be trusted by browsers, which will fire a security warning — you can claim you are anything you want, but it wouldn’t be verified by a trusted third party. If the user trusts the website, they could add an exception in their browser, which would store the certificate and trust it for future visits.
The example certificate above is a self-signed one — you can use it for the domain example.com, and it will work within its validity period.
You can create a self-signed certificate on any platform that has OpenSSL available:
Once the certificate is available, you will have to install it on your server. If you are using hosting and HTTPS registration services from the same provider (many hosting providers also sell HTTPS certificates), there might be an automated procedure to install and enable your newly obtained HTTPS certificate for the website. If you are hosting your website elsewhere, you will need to download the certificate and configure your server to use it.
Step 3: Installing The HTTPS Certificate For Your Website Link
Go back to the “SSL/TLS Manager” home. Click “Certificates (CRT)” to import the new certificate. cPanel “SSL/TLS Manager” (View large version)
You will be redirected to a page to “Paste, Upload or Generate” a new “Certificate.” Paste the contents of the certificate file received from the HTTPS registrar or upload it using the “Browse” button. cPanel “Import” a new HTTPS certificate (View large version)
When you paste the contents of the HTTPS certificate, it will be parsed, and plain text values will be presented to you for confirmation. Review the contents and click the “Save Certificate” button. cPanel “Review” and confirm HTTPS certificate (View large version)
The new HTTPS certificate will be saved, and you will get a confirmation screen: cPanel HTTPS certificate confirmation (View large version)
If you go back to the “Certificates (CRT)” home, you will see your new HTTPS certificate listed: cPanel “Certificates” with the new HTTPS certificate listed (View large version)
Go back to the “SSL/TLS Manager” home. Click “Install and Manage SSL for your website (HTTPS)” to assign the new certificate to your existing website. cPanel “SSL/TLS Manager” (View large version)
You will be presented with the “Install an SSL Website” form. Click the “Browse Certificates” button and select your HTTPS certificate. Select your website domain from the dropdown list (if it’s not automatically selected), and verify that the fields for “Certificate” and “Private Key” are populated. cPanel “Install an SSL Website” (View large version)
Test to see that you can access your website at the address https://www.example.com. If all works OK, you will most probably want to permanently redirect your HTTP traffic to HTTPS. To do so, you’ll have to include several lines of code to an .htaccess file (if you’re using an Apache web server) in your website’s root folder:
RewriteEngine On

RewriteCond %{HTTPS} off
RewriteRule ^(.*)$ https://%{HTTP_HOST}%{REQUEST_URI} [L,R=301]
If the .htaccess file already exists, then paste the RewriteCond and RewriteRulelines only, right after the existing RewriteEngine On directive.
Place the generated private key (example.com.key), Certificate Signing Request (example.com.csr) and the valid HTTPS certificate (example.com.crt) in the appropriate locations:
make -C /usr/ports/www/apache24 config install clean
apachectl restart
Edit the Apache configuration file (httpd.conf):
Debian, Ubuntu /etc/apache2/apache2.conf
Red Hat, CentOS /etc/httpd/conf/httpd.conf
FreeBSD /usr/local/etc/apache2x/httpd.conf
Listen 80
Listen 443
<VirtualHost *:80>
ServerName example.com
ServerAlias www.example.com
Redirect 301 / https://www.example.com/
</VirtualHost><VirtualHost *:443>
ServerName example.com
Redirect 301 / https://www.example.com/
</VirtualHost><VirtualHost *:443>
ServerName www.example.com
...
SSLEngine on
SSLCertificateFile/path/to/signed_certificate_followed_by_intermediate_certs
SSLCertificateKeyFile /path/to/private/key
# Uncomment the following directive when using client certificate authentication#SSLCACertificateFile /path/to/ca_certs_for_client_authentication# HSTS (mod_headers is required) (15768000 seconds = 6 months)
Header always set Strict-Transport-Security "max-age=15768000"...
</VirtualHost># intermediate configuration, tweak to your needs
SSLProtocol all -SSLv3
SSLCipherSuite ECDHE-ECDSA-CHACHA20-POLY1305:ECDHE-RSA-CHACHA20-POLY1305:ECDHE-ECDSA-AES128-GCM-SHA256:ECDHE-RSA-AES128-GCM-SHA256:ECDHE-ECDSA-AES256-GCM-SHA384:ECDHE-RSA-AES256-GCM-SHA384:DHE-RSA-AES128-GCM-SHA256:DHE-RSA-AES256-GCM-SHA384:ECDHE-ECDSA-AES128-SHA256:ECDHE-RSA-AES128-SHA256:ECDHE-ECDSA-AES128-SHA:ECDHE-RSA-AES256-SHA384:ECDHE-RSA-AES128-SHA:ECDHE-ECDSA-AES256-SHA384:ECDHE-ECDSA-AES256-SHA:ECDHE-RSA-AES256-SHA:DHE-RSA-AES128-SHA256:DHE-RSA-AES128-SHA:DHE-RSA-AES256-SHA256:DHE-RSA-AES256-SHA:ECDHE-ECDSA-DES-CBC3-SHA:ECDHE-RSA-DES-CBC3-SHA:EDH-RSA-DES-CBC3-SHA:AES128-GCM-SHA256:AES256-GCM-SHA384:AES128-SHA256:AES256-SHA256:AES128-SHA:AES256-SHA:DES-CBC3-SHA:!DSS
SSLHonorCipherOrder on
SSLCompression off
SSLSessionTickets off
# OCSP Stapling, only in httpd 2.3.3 and later
SSLUseStapling on
SSLStaplingResponderTimeout 5
SSLStaplingReturnResponderErrors off
SSLStaplingCache shmcb:/var/run/ocsp(128000)
This configuration was generated using the Mozilla SSL Configuration Generator, mentioned earlier. Check with it for an up-to-date configuration. Make sure to edit the paths to the certificate and private key. The configuration provided was generated using the intermediate setting — read the limitations and supported browser configurations for each setting to decide which one suits you best.
Some modifications to the generated code were made (marked in bold above) to handle redirects from HTTP to HTTPS, as well as non-www to the www domain (useful for SEO purposes).
Debian, Ubuntu, Red Hat, CentOS /etc/nginx/nginx.conf
FreeBSD /usr/local/etc/nginx/nginx.conf
server {
listen 80 default_server;
listen [::]:80 default_server;# Redirect all HTTP requests to HTTPS with a 301 Moved Permanently response.return 301 https://$host$request_uri;}
server {
listen 443 ssl http2;
listen [::]:443 ssl http2;# certs sent to the client in SERVER HELLO are concatenated in ssl_certificate
ssl_certificate /path/to/signed_cert_plus_intermediates;
ssl_certificate_key /path/to/private_key;
ssl_session_timeout 1d;
ssl_session_cache shared:SSL:50m;
ssl_session_tickets off;# Diffie-Hellman parameter for DHE ciphersuites, recommended 2048 bits
ssl_dhparam /path/to/dhparam.pem;# intermediate configuration. tweak to your needs.
ssl_protocols TLSv1 TLSv1.1 TLSv1.2;
ssl_ciphers 'ECDHE-ECDSA-CHACHA20-POLY1305:ECDHE-RSA-CHACHA20-POLY1305:ECDHE-ECDSA-AES128-GCM-SHA256:ECDHE-RSA-AES128-GCM-SHA256:ECDHE-ECDSA-AES256-GCM-SHA384:ECDHE-RSA-AES256-GCM-SHA384:DHE-RSA-AES128-GCM-SHA256:DHE-RSA-AES256-GCM-SHA384:ECDHE-ECDSA-AES128-SHA256:ECDHE-RSA-AES128-SHA256:ECDHE-ECDSA-AES128-SHA:ECDHE-RSA-AES256-SHA384:ECDHE-RSA-AES128-SHA:ECDHE-ECDSA-AES256-SHA384:ECDHE-ECDSA-AES256-SHA:ECDHE-RSA-AES256-SHA:DHE-RSA-AES128-SHA256:DHE-RSA-AES128-SHA:DHE-RSA-AES256-SHA256:DHE-RSA-AES256-SHA:ECDHE-ECDSA-DES-CBC3-SHA:ECDHE-RSA-DES-CBC3-SHA:EDH-RSA-DES-CBC3-SHA:AES128-GCM-SHA256:AES256-GCM-SHA384:AES128-SHA256:AES256-SHA256:AES128-SHA:AES256-SHA:DES-CBC3-SHA:!DSS';
ssl_prefer_server_ciphers on;# HSTS (ngx_http_headers_module is required) (15768000 seconds = 6 months)
add_header Strict-Transport-Security max-age=15768000;# OCSP Stapling ---# fetch OCSP records from URL in ssl_certificate and cache them
ssl_stapling on;
ssl_stapling_verify on;## verify chain of trust of OCSP response using Root CA and Intermediate certs
ssl_trusted_certificate /path/to/root_CA_cert_plus_intermediates;
resolver <IP DNS resolver>;....}
This configuration was generated using the Mozilla SSL Configuration Generator, mentioned earlier. Check with it for an up-to-date configuration. Make sure to edit the paths to the certificate and private key. The configuration provided was generated using the intermediate setting — read the limitations and supported browser configurations for each setting to decide which one suits you best.
The generator automatically generates code for handling redirects from HTTP to HTTPS, and it enables HTTP/2 out of the box!
Open “Start” → “Administrative Tools” → “Internet Information Services (IIS) Manager.” Click the server name. Double-click “Server Certificates” in the middle column: Open “Internet Information Services (IIS) Manager.” Double-click “Server Certificates.” (View large version)
Click “Complete Certificate Request” in the right column. Click “Complete Certificate Request” in the right column. (View large version)
Select the signed certificate file (example.com.crt) that you obtained from the CA. Enter some name in the “Friendly name” field to be able to distinguish the certificate later. Place the new certificate in the “Personal” certificate store (IIS 8+). Click “OK.” Select the signed certificate file. (View large version)
If the process went OK, you should see the certificate listed under “Server
Certificates.”
You should see the certificate listed under “Server Certificates.” (View large version)
Expand the server name. Under “Sites,” select the website to which you want to assign the HTTPS certificate. Click “Bindings” from the right column. Select the website and click “Bindings.” (View large version)
In the “Site bindings” window, click the “Add” button. Click the “Add” button. (View large version)
In the new window, select:
“Type”: “https”
“IP address”: “All Unassigned”
“Port”: “443”
In the “SSL Certificate” field, select the installed HTTPS certificate by its friendly name. Click “OK.”
Select “HTTPS,” and select the installed HTTPS certificate. (View large version)
You should now have both HTTP and HTTPS installed for this website. You should now have both HTTP and HTTPS installed for this website. (View large version)
You might get a warning sign next to the address bar and a message such as “Connection is not secure! Parts of this page are not secure (such as images).” This does not mean that your installation is wrong; just make sure that all links to resources (images, style sheets, scripts, etc.), whether local or from remote servers, do not start with http://. All resources should be pointed to with paths relative to the root (/images/image.png, /styles/style.css, etc.) or relative to the current document (../images/image.png), or they should be full URLs beginning with https://, such as https://code.jquery.com/jquery-3.1.0.min.js.
These tips should eliminate the mixed-content warnings, and your browser should display the closed padlock without an exclamation mark.
After you have configured your server and have the website up and running on HTTPS, I strongly recommend checking its security configuration using the Qualys SSL Server Test. This performs a scan of your website, including a comprehensive evaluation of its configuration, possible weaknesses and recommendations. Follow the advice there to further improve your server’s security configuration.
Your certificate is valid for a set period — typically, a year. Don’t wait to renew it at the last moment — your registrar will start sending you emails as the renewal date approaches. Do issue a new certificate as soon as you get your first reminder. The procedure is pretty much the same: Create a new certificate signing request, get a new HTTPS certificate, and install it on your server. The certificate’s validity will start running at the time of signing, while the expiration will be set one year after your current certificate expires. Thus, there will be a time when both your old and new certificates will be valid, and then a full new year after the expiration of the old certificate. During the overlap, you will be able to make sure that the new certificate is working OK, before the old one expires, allowing for uninterrupted service of your website.
If your server is compromised or if you think someone might have access to your private key, you should immediately revoke your current HTTPS certificate. Different registrars have different procedures, but it generally boils down to marking the compromised certificate as inactive in a special database of your registrar, and then issuing a new HTTPS certificate. Of course, revoke the current certificate as soon as possible, so that nobody can impersonate you, and get the new certificate only after you have investigated and fixed the cause of the security breach. Please ask your registrar for assistance.
Let’s Encrypt is a free, automated, and open certificate authority (CA), run for the public’s benefit. Let’s Encrypt is a service provided by the Internet Security Research Group (ISRG).
The key principles behind Let’s Encrypt are:
Free
Anyone who owns a domain name can use Let’s Encrypt to obtain a trusted certificate at zero cost.
Automatic
Software running on a web server can interact with Let’s Encrypt to painlessly obtain a certificate, securely configure it for use, and automatically take care of renewal.
Secure
Let’s Encrypt will serve as a platform for advancing TLS security best practices, both on the CA side and by helping website operators properly secure their servers.
Transparent
All certificates issued or revoked will be publicly recorded and available for anyone to inspect.
Open
The automatic issuance and renewal protocol will be published as an open standard that others can adopt.
Cooperative
Much like the underlying Internet protocols themselves, Let’s Encrypt is a joint effort to benefit the community, beyond the control of any one organization.
To take advantage of Let’s Encrypt, set up your hosting account or server properly. Let’s Encrypt offers short-term certificates that need to be renewed regularly in order to keep an HTTPS website operational.
There are some substantial differences in the mode of operation between Let’s Encrypt and the other CAs. Following the first three points above, here are the main ones:
Free
The Let’s Encrypt HTTPS certificates are completely free for the whole lifespan of your website.
Automatic
The Let’s Encrypt HTTPS certificates are valid
for 90 days, unlike regular HTTPS certificates, which are valid for one year. People are encouraged to automate their certificate renewal; for example, the administrator of the server would set up a dedicated software service (or would periodically invoke software from cron) to manage the initial domain validation and subsequent renewal for all hosted domains — set-it-and-forget-it style.
Secure
Let’s Encrypt HTTPS certificates are issued with no compromise on security, leading to certain incompatibilities with older and more exotic platforms. Check the compatibility page to determine whether you are fine cutting off incompatible platforms.
Let’s Encrypt provides only DV certificates. OV and EV are not supported, and there are currently no plans to support them. Single- and multiple-domain HTTPS certificates are offered, but no wildcard ones at the moment. See the Let’s Encrypt FAQ for more information.
Let’s Encrypt’s automated mode of operation enforces some usage limits in order to protect the infrastructure from intentional and unintentional abuse. The rate limits are high enough not to affect regular users with even hundreds of domains. However, if you manage HTTPS certificates at a very large scale, you might want to check them out.
Older and exotic clients (prior to Windows XP SP3) are not supported. Check the compatibility page for details.
Using The Let’s Encrypt HTTPS Certificates In Practice Link
Scroll down to the “Security” section, and click “Let’s Encrypt for cPanel.” cPanel “Security” section (View large version)
You are now in the “Let’s Encrypt for cPanel” section. Check both domain names (example.com and www.example.com), and click “Issue Multiple.” Check both domain names and click “Issue Multiple.” (View large version)
You will be taken to a confirmation screen. Your top-level (i.e. non-www) domain name will be selected as the primary, and your www domain name as an alias, which will be placed in the HTTPS certificate’s “Subject Alt Name” (SAN) record. Click “Issue” to continue. Please be patient and do not refresh the page, because the initial validation might take longer — about a minute or two. Click “Issue” and be patient for about a minute or two. (View large version)
If the process completes successfully, you will see a confirmation message. Click “Go back” to see the installed HTTPS certificate. If the process completes successfully, you will see a confirmation message. (View large version)
You will see your domain listed under “Your domains with Let’s Encrypt certificates.” You may check the certificate’s details and verify that the website opens with the https:// prefix in your browser. Your domains with Let’s Encrypt certificates (View large version)
Cloudflare is a service that provides a content delivery network (CDN), website security, and protection against distributed denial of service (DDoS) attacks. It features a free HTTPS certificate with all subscription plans, including the free one — a shared DV Cloudflare Universal SSL certificate. In order to have a unique HTTPS certificate, you need to upgrade to the Business plan.
To take advantage, simply create an account, set up your website, and visit the “Crypto” section.
CertSimple is an EV-only HTTPS certificate vendor. It is disrupting the EV HTTPS certificate market in a way similar to what Let’s Encrypt is doing in the DV HTTPS certificate market, by providing a faster, easier process of organization validation — an otherwise slow and cumbersome routine. Here are its advantages:
Simplified application procedure
No software to install or command line questions. Live validation, with most details checked before payment.
Fast validation time
Three hours on average versus the industry standard 7 to 10 days.
Free reissues for the lifetime of the certificate
Easily add domain names later or fix a lost private key.
You can read an excellent, in-depth review of the process on Troy Hunt’s blog.
Multiple HTTPS Websites On A Single IP Address Link
Due to the nature of the handshake process, virtual hosts with a single IP address are a problem for TLS. Virtual hosts work by having the client include the domain name as part of the HTTP request header, but when HTTPS is used, the TLS handshake happens before the HTTP headers are sent — the secure channel should be initialized and fully functional before transmitting any plain-text HTTP, including headers. So, the server does not know which HTTPS certificate to present up front to a connecting client, so it presents the first one it finds in its configuration file, which, of course, only works correctly for the first TLS-enabled website.
There are several workarounds: to have a unique IP for each TLS-enabled domain, or to have all domains in a single certificate. Both are impractical — the IPv4 address space is now used up, and having one big HTTPS certificate means that if you want to add a single website to this server, you’ll need to reissue the whole multiple-domain certificate.
An extension to the TLS protocol, named Server Name Indication (SNI), was introduced to overcome this limitation. Both servers and clients should support it, and although SNI support is nowadays widely available, it is still not 100% bulletproof, if compatibility with all possible clients is a requirement.
You can read more about running SNI for Apache, nginx and IIS (8+) in the respective documentation.
One of my most proud accomplishments of late is finally, after 7 years of web development, having one of my personal sites be secured with a valid SSL certificate. Now, this may not sound like such a big thing to some more seasoned developers, but to me, it’s kind of a big deal. My wife had to witness me have a nerdgasm afterward, as I tried to explain to her the significance of having an SSL certificate. Mainly it came down to having that satisfying little green lock with the word “Secure” next to it.
Now, anyone who has tried to get an SSL certificate in the past knows that they are a pain in the but to get. There are hundreds of providers and they can be expensive. Unfortunately, for those exact reasons SSL certificates aren’t usually seen as a priority for smaller sites such as personal blogs like this. Thankfully The Linux Foundation, as well as a myriad of other supporters, have come to the rescue in the form of Let’s Encrypt.
According to Let’s Encrypt’s website:
Let’s Encrypt is a free, automated, and open certificate authority (CA), run for the public’s benefit. It is a service provided by the Internet Security Research Group (ISRG).
What does this mean for us as developers? It simply means that securing your website isn’t just for the big boys anymore. Any developer with a little bit of terminal knowledge can generate and install their very own certificate and get that comforting little “Secure” emblem next to their website’s URL.
So, how do I get started?
Getting started with Let’s Encrypt is super fairly easy. First of all, you should know that my primary development machine right now is running Ubuntu. Yours might be different and that’s okay. The Certbot client works with almost all Unix-based operating systems. Those with Non-Unix systems, such as Windows running Microsoft IIS, aren’t completely out of luck, but my instructions here won’t help. You might try using something like ACMESharpinstead.
For Debian-based Linux distributions such as Ubuntu, the process is fairly straightforward. First, you’ll need to open a terminal window. For those that aren’t familiar with the terminal this can be daunting, but fear not! The terminal isn’t as scary as it first appears.
Paste the following commands into the terminal, making sure to respond yes to any prompts.
After the update has finished, enter the following command. For this example I’m using nginx, if you’re using apache you should install python-certbot-apache instead.
sudo apt-get install python-certbot-nginx
Once the plugin is installed, run the following to generate a cert and automatically add it to your nginx configuration file.
certbot --nginx
It’s also possible to get a little more control when installing your certs. For instance, with this blog I used the --webroot flag to have a validation file placed into this site’s root in order for Let’s Encrypt to verify that this site is mine. The full command I used was:
This installed both certs and then verified that my sites were where I said they were.
Finally, these certificates expire after 90 days, so you will need to renew them often. The easiest way to do that is to run the certbot renew --dry-run command. This creates a cron job that will auto-renew the certificate for you.
Congratulations! You now have an SSL certificate installed! All of the instructions above are also listed on the Certbot Website for a myriad of different distros.
Edit: For people that are wondering about the “super fairly easy”, check out my blog. The original version has a strike through and that didn’t translate here.
By the fall of 2004, WordPress had rolled out 46 plugins. Today, after thirteen years, the WordPress Plugin Directory features staggering 49,402+ plugins with over 1,191,468,914 downloads. This is how the WordPress Plugin Directory looks in April 2017:
WordPress Plugin Directory
The plugins which feature on the WordPress Plugin Directory are free to use and share. These WordPress plugins are licensed under the GPL (General Public License). It is an exclusive place where some of the amazing plugins have been rolled out. And if you want to be a part of this elite club, read along and know about the essentials of publishing a plugin.
In this post, you will have a complete tour of the process of submitting a plugin to the WordPress Plugin Directory. You will also have a step-by-step instruction manual on how to integrate your plugin to WordPress central Subversion repository on a Windows PC as well as on a Mac.
Why Publish Your WordPress Plugin?
There are many reasons to publish your WordPress plugins in the WordPress Directory. Some of the obvious examples are:
Basic Statistics
You can track down the total number of downloads and the active number of users to the precise metrics.
Feedback
Adding a plugin to the WP directory means getting instant feedback from the actual users in the form of comments. The feedback may be in the form of a bug report, suggestions to improve your plugin etc.
Revelation
The WordPress plugin directory is accessed by webmasters and enthusiasts daily. People log into the directory through their WP admin panels. So, the plugin gets a lot of exposure. You can easily attract new users and they may donate as well or buy the premium version.
Easy To Update
If you have launched a plugin through your website in the past, you would be well aware of the hectic scenario of notifying all the users about any updates. Adding the plugin to the WordPress Plugin directory enables you to address all the users with ease.
Authority
If your plugin is able to make it’s way to the official repository, the WordPress community will consider you as a credible developer. People generally prefer the plugins that are in the repository as compared to the ones on the third party websites.
The WordPress Plugin Submission Process
Here, we will discuss the nuts & bolts of submitting a WordPress plugin. The process has been broken down into easy to understand steps and relevant screenshots, making the plugin creation adventure seamless for beginners as well.
Follow The Plugin Guidelines
The easiest way to save yourself from the dilemma of wasting any time or efforts over plugin submission is by following the guidelines effectively. Ensure that the WordPress plugin development is compliant with all the guidelines before you forward it to the plugin directory.
Some of the primary rules to be followed while submitting your plugin to the WordPress plugin directory include:
Ensure that your plugin is compatible with the GPL
The plugin should ask for a user consent before it stores any information
The plugin should not spam its users
The code syntax should clear and accessible
Should not perform any morally offensive practices
Should not embed external links on a public website
Confirm The Plugin Name From The Directory
Log in to wordpress.org/plugins and type in the desired name you wish to have for your plugin. Here’s a screenshot explaining the name search on the WordPress plugin directory.
If there is no plugin with the same name, it might be the case that a plugin might be available but the admin has not shared the initial Subversion commit. Hence, try to submit your plugin to the directory right away to ensure that you are able to register the name. If the plugin name has been taken, you will have to come with a different name.
Create A Robust Plugin
After you have created your plugin and tested it thoroughly, you need to update the code so that the functionalities of the plugin work in the desired way.
Audit The Readme File
The ReadMe file is used to fill out the directory page of the plugin. Here, you need to enter the following:
Name of the plugin
Authors of the plugin
Donate link
Tags
Compatible WordPress versions
License (GPL)
Plugin description
For the plugin tags, it is advised to pick the tags similar to the ones used by similar plugins or the common and relevant ones. You can choose tags by checking out the readme.txt file of similar plugins or looking at the bottom of their page.
Once you have filled out the information, write the main description, steps of instructions, screenshots and frequently asked questions for your plugin. When it comes top adding the plugin screenshots, the more the better. You can also validate your readme file with the ReadMe Validator. The link for the validator can be found in the plugin approval email, which has been discussed later in this post.
Submit Your Plugin
After following the steps mentioned above, it is time to submit your plugin to WordPress for a manual review (plugin directories are analyzed manually).
Enter the name and description for your WordPress plugin. For the URL, you will have to compress the plugin files. Upload the plugin.zip file to Google Drive and insert a public link to the zip file.
Wait For Approval
All plugin directories are analyzed manually. Although the response is quick, you might have to wait for a little before they get back to you.
It may take up to 8 hours before your plugin is reviewed and approved.
Plugin Approval Email
Once WordPress authenticates your plugin, you will get a confirmation email from them.
Store Plugin Files In The WordPress Subversion Repository
A subversion is a control tool that enables an admin to track all the tweaks made to a plugin and get back to the older versions of the plugin if required.
Since your plugin has been approved by WordPress, you need to copy it in your WordPress Subversion repository. The repository is the place where the plugin files will be stored. If someone needs a copy of your plugin, they can get it from the repository. Yet, only the admins who are authorized in the readme file can make any modifications to the repository.
There are two elementary methods by which you can store your plugin in the WordPress Subversion repository. First, it is for the Windows users and the second is for the ones using a Mac. Let us begin with the instructions or Windows.
On A Windows PC
If you want to publish your plugin on a Windows computer, you will have to download a compatible version of the Subversion client. The popular ones are:
Tortoise SVN: For Windows users with the GUI feature
Versions: Another option for Mac usersAmong all the Subversion clients available, the Tortoise SVN is a popular choice. Let us see the installation process for the Tortoise SVN:Once the download is complete, open the Setup Wizard as below.
Click the Next button.
Select the first option where it says to accept the Agreement and Conditions and click on Next.
Additionally, if you need the command line tools, select the command line client tools and go to:
‘Will be installed on the local hard drive.’
Click
Click on the Finish option to confirm the installation. Now that you are done with the installation, you are all set to work with Subversion (SVN). Open the Windows Explorer. Select the directory you want your WordPress SVN repository to be placed in. Now, select that directory and right click on the icon. This will open a window as below:
Click on the checkout drop down menu.
Enter the repository URL into the field. Go to your approval email by WordPress where you can find that URL. This is generally in the format like:
Once you get the dialog box similar to the screenshot above, it is verified that the checkout was successful. Now, all of the WordPress central repository files and directories have been downloaded on your local computer and in the directory which you picked.
The directory that you chose should now hold assets, trunk, branches and tags directories. You need to add all of your plugin’s files to the newly added trunk directory. Then, you need to open up Windows Explorer, click on your SVN repository directory icon, and right click on that directory icon.
Select the SVN Commit option. The following screenshot displays how the different files are added and customized in your SVN repository. Remember, select only those checkboxes which you wish the repository to track. Preferably, select all the checkboxes so that all the plugin files are added to the central repository.
Click on OK. With this, the modified, as well as the newly added files will be available in the central WordPress SVN repository and your local computer. If you are using more than one computers, you should ensure that you run the SVN Update feature to collaborate your local repository with the central WP repository.
This can simply be done by using Windows Explorer to locate the SVN repository directory and selecting it. Right click on the directory icon and select SVN Update as shown:
Select the SVN Update option from the drop-down menu. As mentioned earlier, it will ensure that the copy is up to date as per the central WordPress repository.
On A Mac
On a Mac, the plugin is stored in the Subversion repository through the command line. Open the Terminal application. Locate the parent directory for your plugin.
Use cd ‘directory name’ to open a directory
Use cd .. to move to a parent directory.
Use the ls -a to list all of the files and directories.
When you access the parent directory, run the following command in the terminal window:
Replace the name of the directory at the end of the command with the name you wish to keep.
You will be asked for the following options:
(R)eject, accept (t)emporarily or accept (p)ermanently?
Type in ‘t’ or ‘p’ and enter. You will receive the message to confirm that the plugin directory has been created on your computer as well as the tags, trunk and branches are added in the Subversion repository directory.
Place all of your plugin files in the trunk directory. Now that you have your plugin files in the trunk directory, you need to add those files to your Subversion repository so that they can be tracked. You can do this by running the terminal command as mentioned below:
$ svn add trunk/*
You then need to push the changes made to your local repository to the central WordPress repository by running the following command in your terminal window.
$ svn ci -m Add first version of plugin
Now, you will be asked to provide your username and password for the WordPress account.
Once these credentials are entered and verified, the plugin files will be sent to the central repository. You will get a Transmitting File Data message, followed by a Committed revision message. This will be similar to the following:
Transmitting file data
…………………………………………………………………………………………………………………………………
Committed revision 1204654
That’s it. You will soon get an email from WordPress which will let you know of the new commit.
If your plugin features multiple contributors or computers, it is mandatory to run the update command prior to committing any modifications.
$ svn up
This replicates the changes from the central WordPress repository to the local plugin repository.
Sublime Text is, no doubt, one of the most powerful text editors out there. The number of satisfied users attests to that. If you explore it, you will eventually see how beautifully its powerful features are hidden behind a simple and elegant interface. If you have been using Sublime Text for some time, now is the time to upgrade your arsenal with new ammunition. I’ll be taking you through some of my favorite tips and tricks. Knowing them might just unleash your hidden powers as a programmer to the world.
Package Control is a one-stop solution for downloading and managing Sublime Text-related plugins and themes. The installation instructions are available on the Package Control website.
Once it is installed, you can access it using the command palette. To install a plugin, press Cmd ⌘ + Shift ⇧ + P (Mac) or Ctrl ⌃ + Shift ⇧ + P(Windows and Linux), and then enter Install Package and press “Return.” The list of plugins in the repository takes a few moments to load, but then you can type the name of the plugin you are interested in and install it from there. Some of my favorite plugins are listed below.
Sublime Text’s default sidebar can only do some limited tasks. The Sidebar Enhancements plugin supercharges Sublime Text with commands for opening the file in a browser, copying, pasting, copying a path, duplicating, deleting and more.
Plain Tasks converts Sublime Text into a powerful to-do list manager. You can install it via Package Control. Create a file with .todo as the extension to activate Plain Tasks on top of it. For other tips, you can access the tutorial provided in the plugin, available at “Preferences” → “Package Settings” → “Plain Tasks” → “Tutorial.”
Check for errors in your code using Sublime Linter. The plugin provides a framework for linting your code. The actual linting is done by various plugins (for Ruby, Python, JavaScript etc.), which means you need to install Sublime Linter first and then install syntax-specific linters for your code. Extensive documentation is available.
Emmet, once known as Zen Coding, is an indispensable tool for any web developer. It is probably the most productive and time-saving plugin you’ll ever find.
Writing code takes time, and HTML grunt work such as writing tags and wrapping classes with quotes can be boring. Emmet takes care of all that. It magically expands abbreviations into a whole HTML or CSS structure. The syntax it uses for these abbreviations is inspired from CSS selectors. Let’s watch it in action.
Sublime Tutor is an interactive in-editor tutorial for keyboard shortcuts in Sublime Text. If you have just started with Sublime Text, the plugin will instantly boost your productivity by teaching you nifty tips and tricks within the editor itself. The plugin uses the spaced repetition technique to make sure you remember the commands it teaches.
Sublime Tutor.
Use Package Control to install the plugin. Once it is installed, you can access the tutor via the “Help” menu or the Ctrl ⌃ + Alt ⌥ + K keyboard shortcut.
Put your cursor on a word, press the keyboard shortcode, and the word will instantly be selected. If you press the same key combination again, Sublime Text will go into multi-selection mode and select other instances of the same word in the document. You can use this method to quickly add or replace text in all instances of a word.
Word selection.
Ctrl ⌃ + Cmd ⌘ + G (Mac)
Alt + F3 (Windows and Linux)
This is another way to achieve the same thing. Instead of incrementally searching for a word, it performs a bulk search of the word under the cursor and switches to multi-selection mode.
This shortcut is extremely useful for JavaScript developers. It selects the current scope. Pressing the same key combination again selects its parent scope. The video makes clear how it works:
Use this shortcut to break the selected area into multiple lines, putting Sublime Text in multi-selection mode. I use this trick to quickly convert a list of words into an enclosed array of strings.
Use this shortcut to select a column in Sublime Text. Put your cursor anywhere in the document, and then press the shortcut to select columns upwards or downwards. This also takes you into multi-selection mode, like the two commands above.
I like to keep my CSS properties sorted alphabetically. This command is extremely useful for that. Select the block that you need to be sorted (pro tip: use Ctrl ⌃ + Shift ⇧ + J to select an indentation level), and then press the keyboard shortcode.
This is one of my most frequently used shortcut. Marking comments in any programming language is made simple with this shortcut. In an HTML file, it puts in a pair of <!-- --> tags, while in JavaScript it puts // at the beginning of a line.
Shift ⇧ + Ctrl ⌃ Up ↑ / Down ↓ (Windows and Linux)
Want to move a snippet of code five lines up? Cutting and pasting is really old school. Use this keybinding to take the snippet wherever you’d like. Press the shortcut again to keep moving it further up or down.
By default, this shortcut duplicates the current line and puts it on the next line. If you select a region and press this shortcut, it duplicates the whole region.
This joins the following line to the current line, replacing all white space in between with a single space. Performed on a block of lines, this joins all of the lines together.
Use this command to move your cursor from one bracket position to another. This is especially useful when you get lost in a long method and want to reach its starting position (or vice versa).
This is the grep equivalent of Sublime Text. It finds a term within an entire project. The special thing about this command is that it is blazing fast. There are options to make it case-sensitive and to perform a regex match as well.
To search for a particular term in the current document, project-wide, put the cursor on that term and then press Ctrl ⌃ + E, which will put that term in the search box. Pressing the shortcode above populates the project-wide search box with this term.
Ctrl ⌃ + Page Up ⇞ or Page Down ⇟ (Windows and Linux)
Just like in a web browser, you can open multiple tabs in Sublime Text. To move from one tab to another, you can use the shortcuts noted above, and use Cmd ⌘ + T (Mac) or Ctrl ⌃ + N (Windows and Linux) to create a new tab.
As you become proficient with Sublime Text, you’ll want to access the menus less and less and instead be able to do everything with a few taps of the keyboard. With the command palette, you can quickly type a command, and Sublime Text will do a fuzzy match with an existing set of commands, letting you access the commands from a convenient place.
Here are some things you can try in the command palette — set the syntax of a newly created file, sort lines in the current document, and install a plugin using Package Control.
Sublime Text comes with an embedded Python interpreter. It’s a handy tool to execute Python commands or to quickly test Sublime Text’s APIs when you’re developing a plugin for the editor.
Keep in mind that this interpreter comes bundled with Sublime Text, and it is different from your system-installed Python. The purpose of this console is to interact with Sublime Text’s API for plugins. You probably used this console when installing Package Control.
For writers and others who need to be able to concentrate intently, Sublime Text has an even more minimalistic interface. Use the shortcut to toggle distraction-free mode on and off.
Sublime Text includes a command-line tool that makes it super-easy to work with files on the command line. To get it working on a Mac, you need to make it available in your shell.
Assuming you’ve placed Sublime Text in the “Applications” folder and that you have a ~/bin directory in your path, you can run the following:
Sublime Text is full of such powerful shortcuts and commands. You probably won’t be able to remember these just by skimming this article; rather, you’ll need to practice as you’re going through it. List the most useful shortcuts for yourself, and refer to them regularly as you’re working with Sublime Text. Practice is the key. You are on your way to becoming a Sublime Text ninja.
Anyone who has created a WordPress plugin understands the need to create configurable fields to modify how the plugin works. There are countless uses for configurable options in a plugin, and nearly as many ways to implement said options. You see, WordPress allows plugin authors to create their own markup within their settings pages. As a side effect, settings pages can vary greatly between plugins. In this article we are going to go over three common ways you can make your plugin configurable. We will start by creating a settings page and create our fields using the default WordPress Settings API. I will then walk you through how to set up your fields with a custom handler. Finally, I will show you how to integrate a great configurable fields plugin Advanced Custom Fields (ACF) into your own plugin.


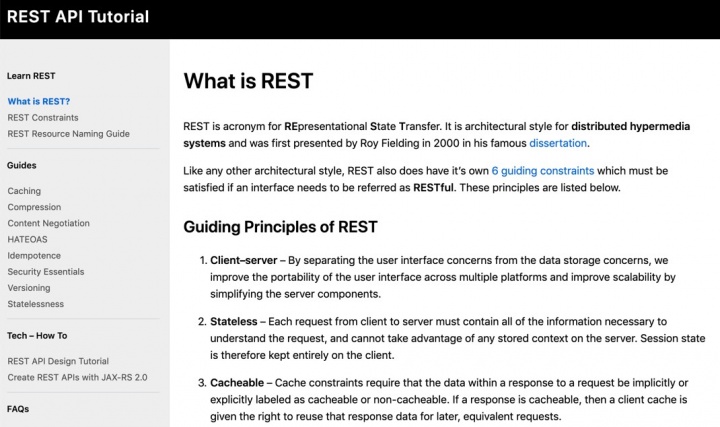


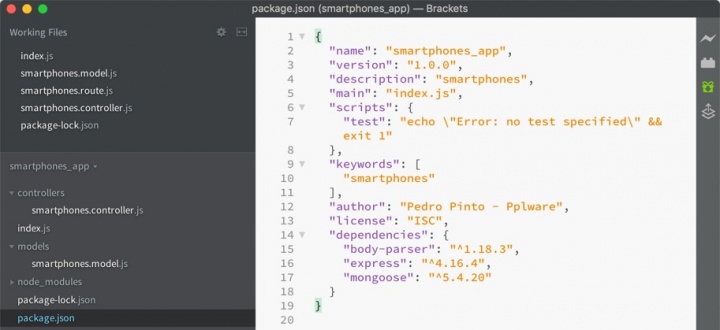

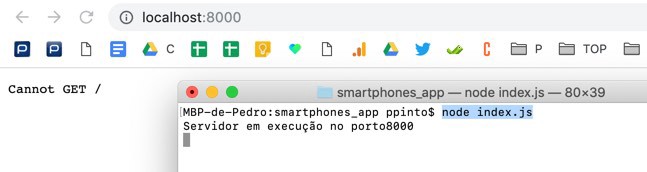
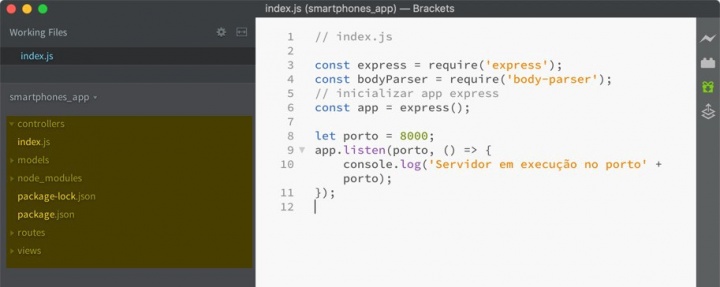
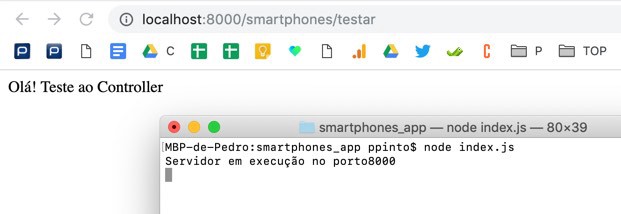
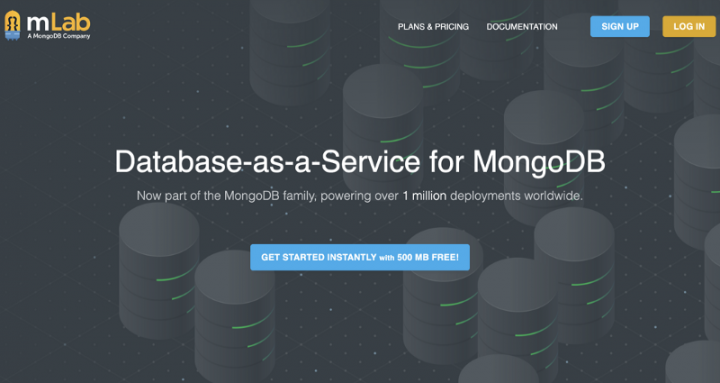
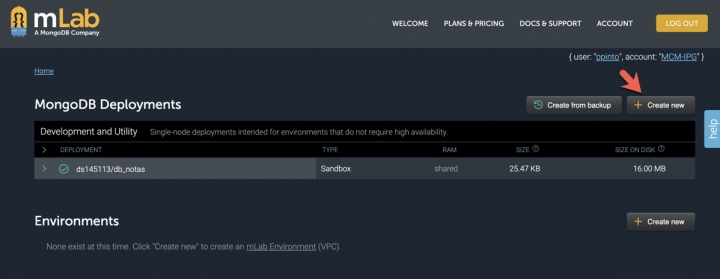
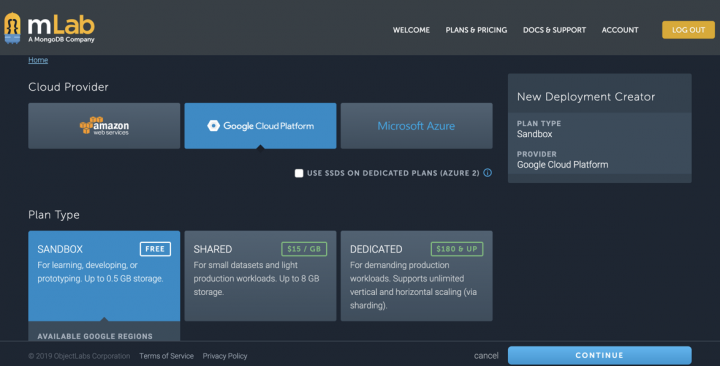


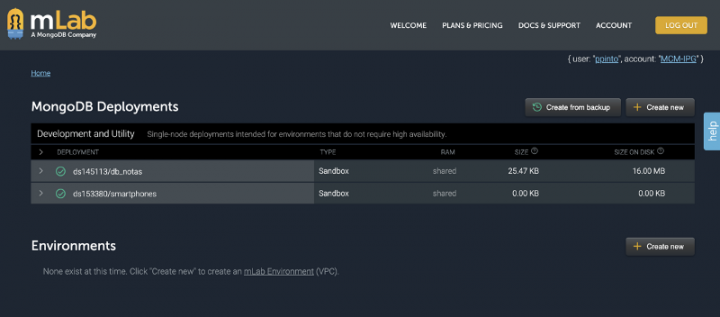
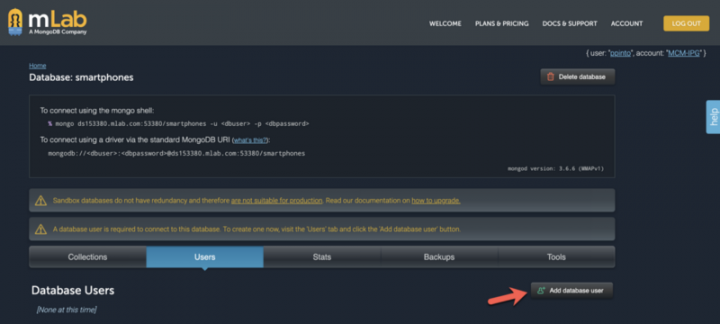


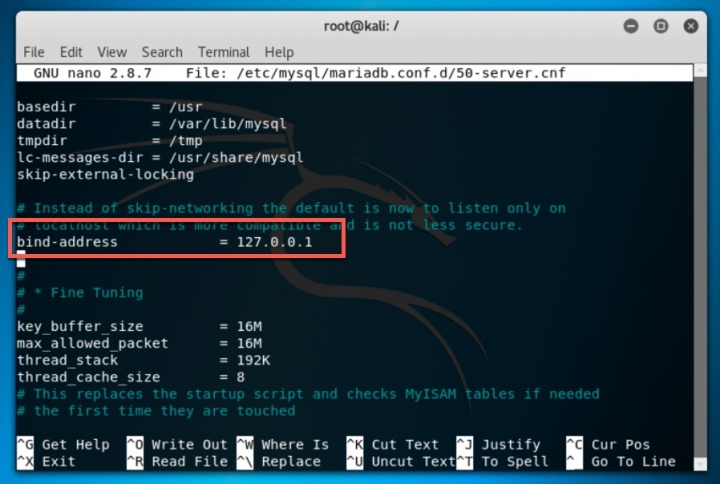


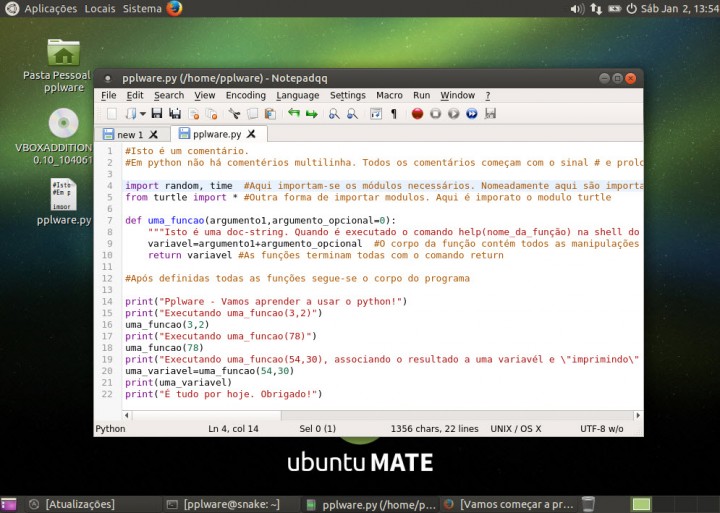
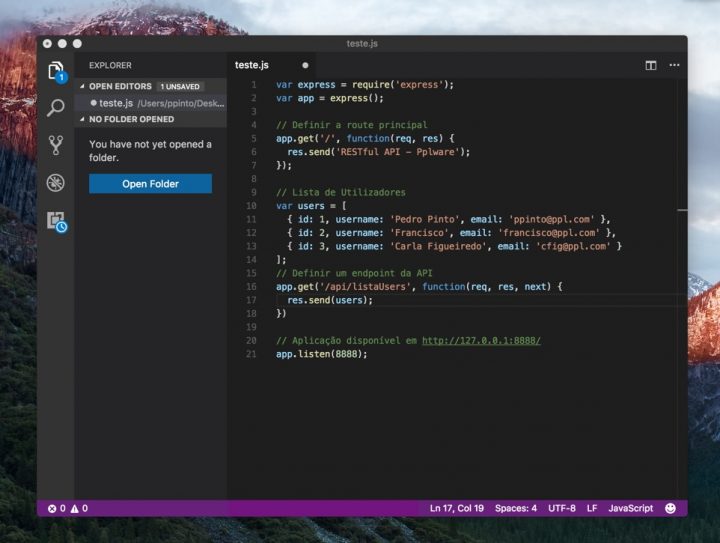
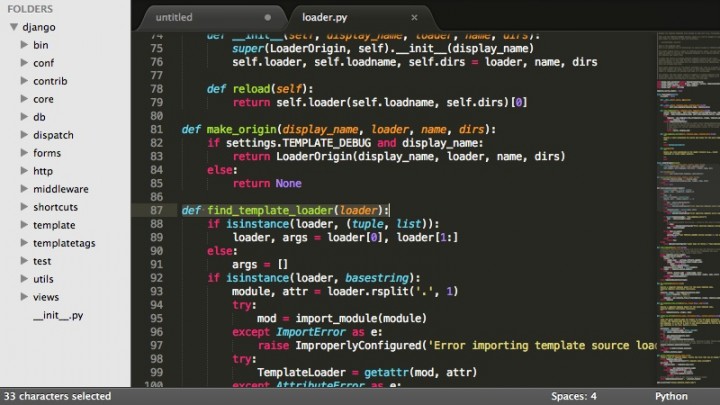
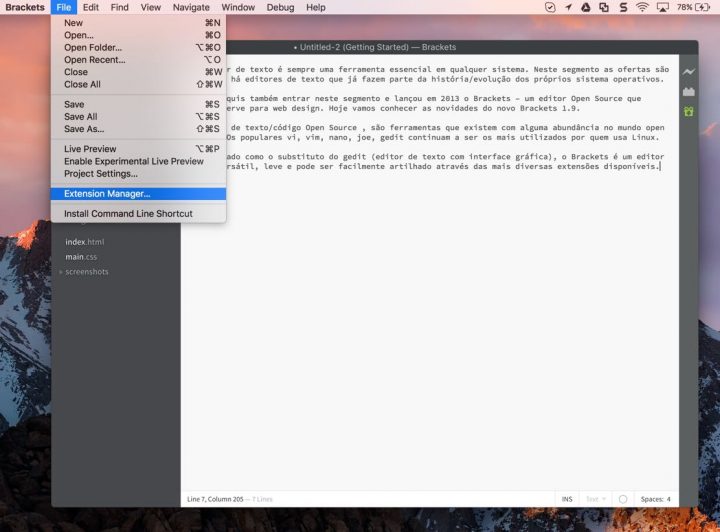
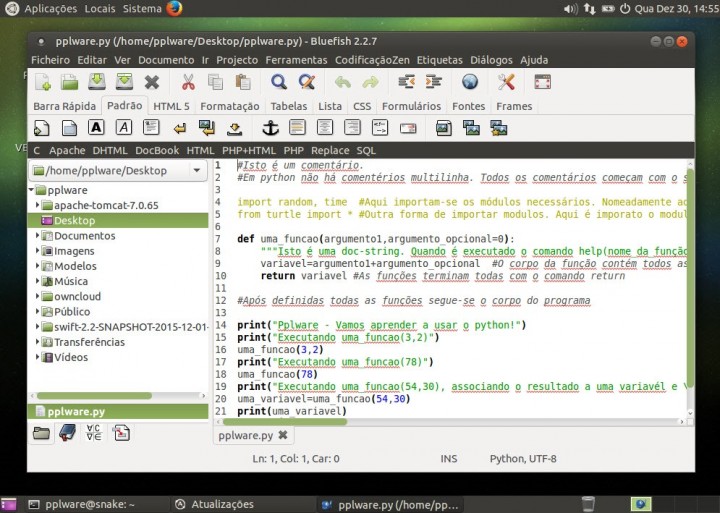
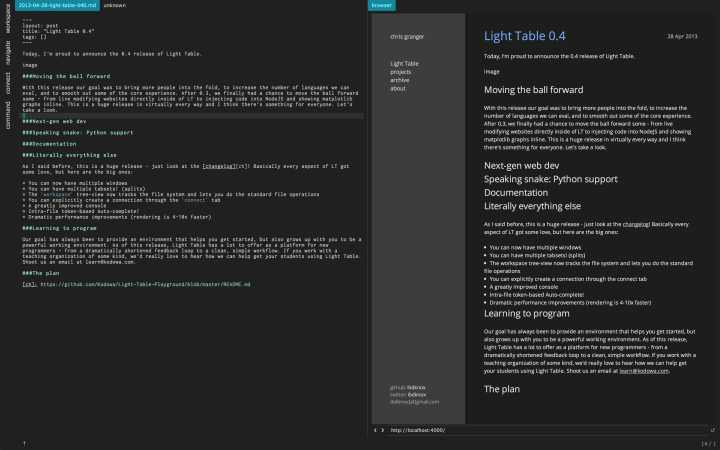
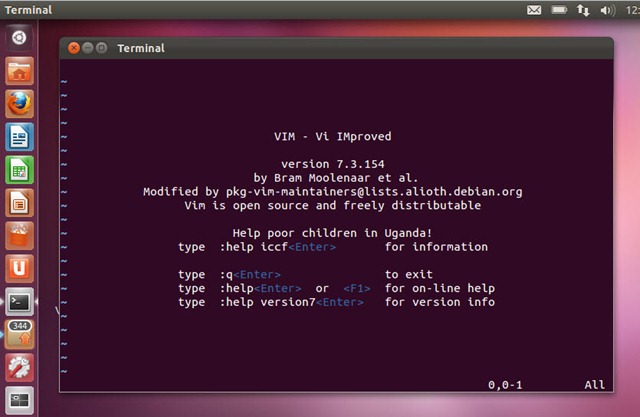
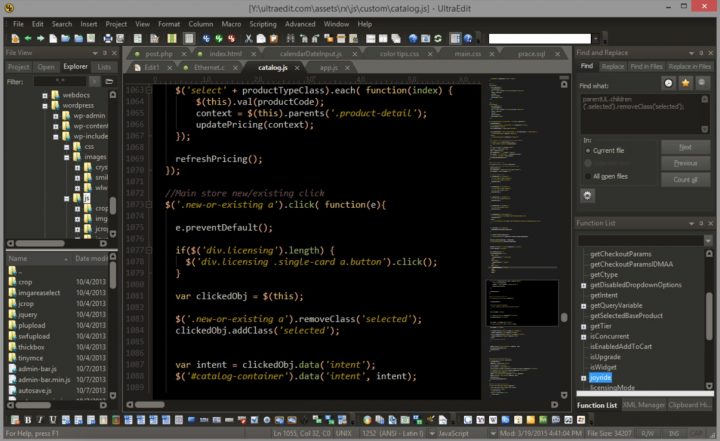


 Manager. Double-click Server Certificates")


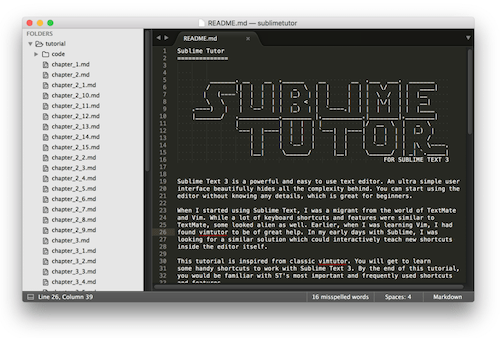


