In part one of the tutorial series Developing a WordPress Theme From Scratch, we learned what WordPress is, what it can do, and how to do the following:
- Set up a local Apache, MySQL, PHP (*AMP) environment
- Install WordPress on your local server
- Take an existing static HTML & CSS site and make it into a custom WordPress theme
- Divide your theme into sections (
index.php,header.php,footer.php,sidebar.php, andcontent.php) - Use The Loop to make posts and pages
- Migrate local WordPress site to a live server
We created this theme using Bootstrap, and more specifically the official generic blog template. While the theme could use custom CSS or any framework, I went with Bootstrap so that we can focus on creating the theme’s function without worrying about the style.
Here is what the theme looked like at the end of the last article:
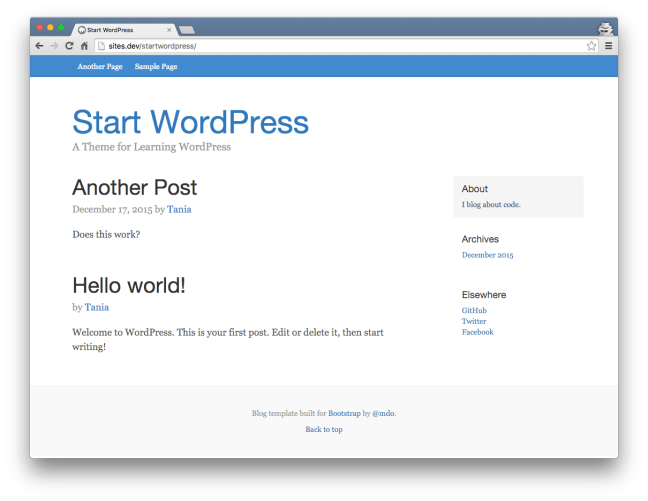
Very simple, but it effectively demonstrates how to use the WordPress Loop to display content dynamically.
In this article, we’re going to go through more essential WordPress theming techniques.
Prerequisites
- Basic knowledge of HTML and CSS
- Ability set up WordPress and make a basic theme (covered in part one)
Goals
- Create individual post pages –
single.php - Add pagination
- Include comments
- Learn how to use
functions.php - Properly enqueue stylesheets and scripts
- Create global custom fields
- Create custom post types
First, I’m going to start off by adding individual blog posts and pagination.
Individual Post Pages
In the last article, we made header, footer, sidebar, content, and page files. Now we’re going to make single.php, which is an individual post page. It’s going to be an exact duplicate ofpage.php, except I’m going to change 'content' to 'content-single'.
<?php get_header(); ?>

	<div class="row">
		<div class="col-sm-12">

			<?php
				if ( have_posts() ) : while ( have_posts() ) : the_post();
					get_template_part( 'content-single', get_post_format() );
				endwhile; endif;
			?>

		</div> <!-- /.col -->
	</div> <!-- /.row -->

<?php get_footer(); ?>
Now you’ll create content-single.php, which is a duplicate of content.php.
<div class="blog-post">
	<h2 class="blog-post-title"><?php the_title(); ?></h2>
	<p class="blog-post-meta"><?php the_date(); ?> by <a href="#"><?php the_author(); ?></a></p>
 <?php the_content(); ?>
</div><!-- /.blog-post -->
So now you can see that index.php is pulling in content.php, and single.php is pulling incontent-single.php.
Going back to the original content.php, we have the title of each article.
<h2 class="blog-post-title"><?php the_title(); ?</h2>Using the_permalink(), we’re going to link to the single page.
<h2 class="blog-post-title"><a href="<?php the_permalink(); ?>"><?php the_title(); ?></a></h2>Now you have a blog posts on the main page that are linking individual blog post page.

Finally, we’ll want to change the_content() to the_excerpt() on content.php. The excerpt will only show the first 55 words of your post, instead of the entire contents.
<?php the_excerpt(); ?>Pagination
In the original Bootstrap blog example, there is pagination to be able to click through multiple pages if you have many blog posts.

Currently, your index.php file looks like this.
<?php get_header(); ?>

	<div class="row">
		<div class="col-sm-8 blog-main">

			<?php
			if ( have_posts() ) : while ( have_posts() ) : the_post();
				get_template_part( 'content', get_post_format() );
			endwhile; endif; ?>

		</div>	<!-- /.blog-main -->
		<?php get_sidebar(); ?>
	</div> 	<!-- /.row -->

<?php get_footer(); ?>
If you’ll notice, the loop has if and while, then later endif and endwhile. To insert pagination, we’ll have to put it after the endwhile but before the endif. This means that it won’t repeat for each loop, but will only show up once based on posts.
Pagination links are called like this:
<?php next_posts_link( 'Older posts' ); ?>
<?php previous_posts_link( 'Newer posts' ); ?>
In index.php, between endwhile; and endif;, I’m going to place this code.
<nav>
	<ul class="pager">
		<li><?php next_posts_link( 'Previous' ); ?></li>
		<li><?php previous_posts_link( 'Next' ); ?></li>
	</ul>
</nav>
By default, 10 posts will show up on a page before it will link to another page. For testing purposes, I’m going to go to Settings > Reading and change Blog pages show at most to 1.
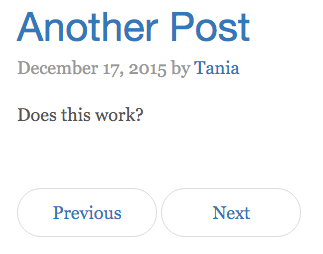
Now we have functioning pagination.
Comments
One of the biggest advantages WordPress and server based content management systems have over static site generators is the ability to include comments without using a third party. (However, static site generators have many more advantages – I have an article on setting up Jekyll if you’re interested in learning how to use them.)
Comments seem complicated to set up, but it doesn’t have to be hard at all. First, we’re going to go back to single.php and enable the comments.
Right now, the code looks like this.
if ( have_posts() ) : while ( have_posts() ) : the_post();
	get_template_part( 'content-single', get_post_format() );
endwhile; endif;
We’re going to change it to look like this.
if ( have_posts() ) : while ( have_posts() ) : the_post();
	get_template_part( 'content-single', get_post_format() );

	if ( comments_open() || get_comments_number() ) :
	  comments_template();
	endif;

endwhile; endif;
This is just telling the single post to display the comments template. Now we’ll createcomments.php.
<?php if ( post_password_required() ) {
	return;
} ?>
	<div id="comments" class="comments-area">
		<?php if ( have_comments() ) : ?>
			<h3 class="comments-title">
				<?php
				printf( _nx( 'One comment on “%2$s”', '%1$s comments on “%2$s”', get_comments_number(), 'comments title'),
					number_format_i18n( get_comments_number() ), get_the_title() );
				?>
			</h3>
			<ul class="comment-list">
				<?php
				wp_list_comments( array(
					'short_ping'  => true,
					'avatar_size' => 50,
				) );
				?>
			</ul>
		<?php endif; ?>
		<?php if ( ! comments_open() && get_comments_number() && post_type_supports( get_post_type(), 'comments' ) ) : ?>
			<p class="no-comments">
				<?php _e( 'Comments are closed.' ); ?>
			</p>
		<?php endif; ?>
		<?php comment_form(); ?>
	</div>
Comments are not the simplest part of WordPress theming, but I’ve managed to reduce it down to a small enough code block.
First, we’re setting functionality to prevent users from posting comments if you’ve set your settings to password protected comments (post_password_required()). Then we’re creating a comments div, and if there are comments (have_comments()), it will display how many comments there are on the post (get_comments_number()), followed by the list of comments (wp_list_comments()). If the comments are closed (! comments_open()), it will let you know; at the end will be the form to submit a comment (comment_form()).
Without adding any styles, here is how the functioning single blog post looks.
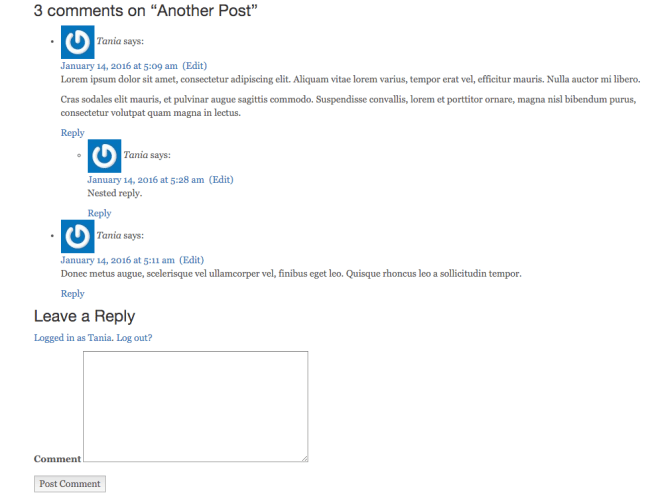
Obviously the styles aren’t quite there yet, but I don’t want to focus on that in this article. Remove the list-style on the uls, add some padding and margins and possibly some borders and background colors, and you’ll have a much prettier comment setup.
Of course, you might want to show how many comments there are or link to the comments from the main page. You can do that with this code inserted into content.php.
<a href="<?php comments_link(); ?>">
	<?php
	printf( _nx( 'One Comment', '%1$s Comments', get_comments_number(), 'comments title', 'textdomain' ), number_format_i18n( 						get_comments_number() ) ); ?>
</a>
Now that we have pagination, blog posts, and comments set up, we can move on to functions.
Using and Understanding the WordPress Functions File
Located in your theme directory, you can create a file called functions.php. You can usefunctions.php to add functionality and change defaults throughout WordPress. Plugins and custom functions are basically the same – any code you create can be made into a plugin, and vice versa. The only difference is that anything you place in your theme’s functions is only applied while that theme is actively selected.
I have a README on GitHub of useful WordPress functions, which might come in handy the more you use them.
functions.php seems complicated, but it’s mostly made up of a bunch of code blocks that, simplified, look like this:
function custom_function() {
	//code
}
add_action( 'action', 'custom_function');
So, we’re creating our custom function, and adding it in based on action references. Within this file, you can pretty much change or override anything in WordPress.
Let’s go ahead and make functions.php and place it in our theme directory.
Since it’s a PHP file, it needs to be begin with the opening PHP tag. It doesn’t need a closing tag; pure PHP files don’t need closing tags.
<?phpEventually, you can insert these types of functions into your own custom plugin that can be used across many themes, but for now we’ll learn how to do it in the theme specific file.
Enqueue Scripts and Stylesheets
By the end of the last article, I was incorrectly linking to my CSS and JavaScript in the header and footer, respectively. This should be done through the functions file.
I’m going to make css, js and images directories in the root of my theme. So here’s what I have:
- css
- bootstrap.min.css
- blog.css
- js
- bootstrap.min.js
Now here’s the first code block we’re going to put in functions.php:
// Add scripts and stylesheets
function startwordpress_scripts() {
	wp_enqueue_style( 'bootstrap', get_template_directory_uri() . '/css/bootstrap.min.css', array(), '3.3.6' );
	wp_enqueue_style( 'blog', get_template_directory_uri() . '/css/blog.css' );
	wp_enqueue_script( 'bootstrap', get_template_directory_uri() . '/js/bootstrap.min.js', array('jquery'), '3.3.6', true );
}

add_action( 'wp_enqueue_scripts', 'startwordpress_scripts' );
In order for these to properly be inserted into your theme, <?php wp_head(); ?> needs to be placed before the closing </head> tag, and before the closing </body> tag.
By common WordPress convention, I’m naming my script after my theme (startwordpress_scripts()). wp_enqueue_style is for inserting CSS, andwp_enqueue_script for JS. After that, the array contains the ID, location of the file, an additional array with required depenedencies (such as jQuery), and the version number.
Now we have jQuery, Bootstrap CSS, Bootstrap JS, and custom CSS being properly loaded into the website.
Enqueue Google Fonts
The function to include the Google Fonts stylesheets is slightly different, based on the dynamic nature of the URL. Here is an example using Open Sans.
// Add Google Fonts
function startwordpress_google_fonts() {
				wp_register_style('OpenSans', 'http://fonts.googleapis.com/css?family=Open+Sans:400,600,700,800');
				wp_enqueue_style( 'OpenSans');
		}

add_action('wp_print_styles', 'startwordpress_google_fonts');
Now I have Open Sans by Google Fonts linked in my page.
Fix the WordPress Title
If you’ll notice, we’re currently pulling in the title for the website with this code.
<title><?php echo get_bloginfo( 'name' ); ?></title>This is not very intuitive – it means that whatever you have set as your website’s title will be the title tag for every page. However, we’re going to want each individual page to show the title of the article first, and also include a reference to the main site title.
We can change the title tag to this.
<title><?php wp_title( '|', true, 'right' ); ?></title>And in functions.php, add this code block.
// WordPress Title
function startwordpress_wp_title( $title, $sep ) {
	global $paged, $page;
	if ( is_feed() ) {
		return $title;
	}
	// Add the site name.
	$title .= get_bloginfo( 'name' );
	// Add the site description for the home/front page.
	$site_description = get_bloginfo( 'description', 'display' );
	if ( $site_description && ( is_home() || is_front_page() ) ) {
		$title = "$title $sep $site_description";
	}
	return $title;
}
add_filter( 'wp_title', 'startwordpress_wp_title', 10, 2 );
The original source of this code can be found on Tom McFarlin’s blog.
Create Global Custom Fields
Sometimes, you might have custom settings that you want to be able to set globally. An easy example on this page is the social media links on the sidebar.
Right now these links aren’t leading anywhere, but we want to be able to edit it through the admin panel. The source of this code is modified from this Settings API tutorial.
First, we’re going to add a section on the left hand menu called Custom Settings.
// Custom settings
function custom_settings_add_menu() {
  add_menu_page( 'Custom Settings', 'Custom Settings', 'manage_options', 'custom-settings', 'custom_settings_page', null, 99);
}
add_action( 'admin_menu', 'custom_settings_add_menu' );
Then we’re going to create a basic page.
// Create Custom Global Settings
function custom_settings_page() { ?>
  <div class="wrap">
    <h1>Custom Settings</h1>
    <form method="post" action="options.php">
       <?php
           settings_fields('section');
           do_settings_sections('theme-options');
           submit_button();
       ?>
    </form>
  </div>
<?php }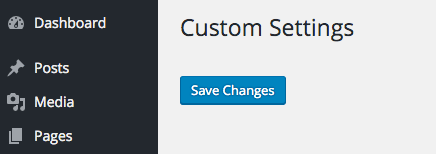
The code contains a form posting to options.php, a section and theme-options, and a submit button.
Now we’re going to create an input field for Twitter.
// Twitter
function setting_twitter() { ?>
<input type="text" name="twitter" id="twitter" value="<?php echo get_option('twitter'); ?>" />
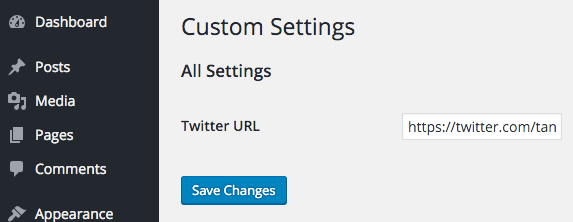
<?php }Finally, we’re going to set up the page to show, accept and save the option fields.
function custom_settings_page_setup() {
  add_settings_section('section', 'All Settings', null, 'theme-options');
  add_settings_field('twitter', 'Twitter URL', 'setting_twitter', 'theme-options', 'section');

  register_setting('section', 'twitter');
}
add_action( 'admin_init', 'custom_settings_page_setup' );
Now I’ve saved my Twitter URL in the field.
For good measure, I’m going to add another example, this time for GitHub.
function setting_github() { ?>
  <input type="text" name="github" id="github" value="<?php echo get_option('github'); ?>" />
<?php }
Now you’ll just duplicate the fields in custom_settings_page_setup.
  add_settings_field('twitter', 'Twitter URL', 'setting_twitter', 'theme-options', 'section');
  add_settings_field('github', 'GitHub URL', 'setting_github', 'theme-options', 'section');

	register_setting('section', 'twitter');
  register_setting('section', 'github');
Now back in sidebar.php, I’m going to change the links from this:
<li><a href="#">GitHub</a></li>
<li><a href="#">Twitter</a></li>
To this:
<li><a href="<?php echo get_option('github'); ?>">GitHub</a></li>
<li><a href="<?php echo get_option('twitter'); ?>">Twitter</a></li>
And now the URLs are being dynamically generated from the custom settings panel!
Featured Image
You might want to have a featured image for each blog post. This functionality is not built into the WordPress core, but is extremely easy to implement. Place this code in yourfunctions.php.
// Support Featured Images
add_theme_support( 'post-thumbnails' );
Now you’ll see an area where you can upload an image on each blog post.
I’m just going to upload something I drew in there for an example. Now, display the image in content-single.php.
<?php if ( has_post_thumbnail() ) {
  the_post_thumbnail();
} ?>
Now you have an image on your individual post pages! If you wanted the thumbnail to show up on on the main blog page as well, you could do something like this on content.phpto split the page if a thumbnail is present:
<?php if ( has_post_thumbnail() ) {?>
	<div class="row">
		<div class="col-md-4">
			<?php	the_post_thumbnail('thumbnail'); ?>
		</div>
		<div class="col-md-6">
			<?php the_excerpt(); ?>
		</div>
	</div>
	<?php } else { ?>
	<?php the_excerpt(); ?>
	<?php } ?>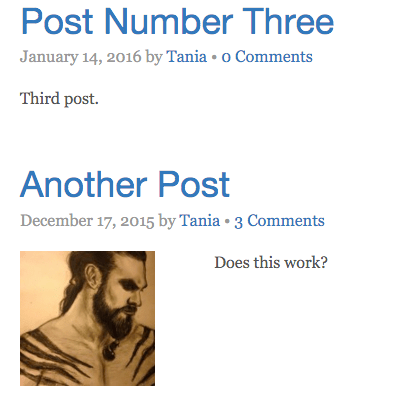
Custom Post Types
One of the most versatile way to extend your WordPress site as a full blown content management system is with custom post types. A custom post type is the same as Posts, except you can add as many of them as you want, and with as much custom functionality as you want.
If you’re interested in using plugins, you can download the Advanced Custom Fields plugin, which will add a great deal of customizability to your theme with little effort.
For now, I’m going to show you how to set up a simple custom post type, and call the post in it’s own loop. There is much more that can be done with custom post types, but that’s a bit more complicated and deserves an article all of its own.
Custom Post Types on the WordPress codex will also give you more insight on some of the possibilities available.
In functions.php, I’m going to create the custom post type called My Custom Post.
// Custom Post Type
function create_my_custom_post() {
	register_post_type('my-custom-post',
			array(
			'labels' => array(
					'name' => __('My Custom Post'),
					'singular_name' => __('My Custom Post'),
			),
			'public' => true,
			'has_archive' => true,
			'supports' => array(
					'title',
					'editor',
					'thumbnail',
				  'custom-fields'
			)
	));
}
add_action('init', 'create_my_custom_post');
In the create_my_custom_post(), I’ve created a post called My Custom Post with a slug ofmy-custom-post. If my original URL was example.com, the custom post type would appear at example.com/my-custom-post.
In supports, you can see what I’m adding – title, editor, thumbnail, and custom fields. These translate to the fields on the back end that will be available.
titleis the title field that I call with<?php the_title(); ?>.editoris the content editing area that I call with<?php the_content(); ?>.thumbnailis the featured image that I call with<?php the_post_thumbnail(); ?>.custom-fieldsare custom fields that I can add in and call later.
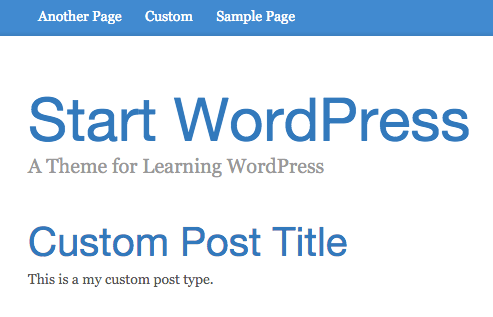
I’ve decided I’m going to make a new page for the custom post to loop in. I created a page called Custom, which will appear at example.com/custom. Right now, my page is pulling from page.php, like all the other pages.
I’m going to create page-custom.php, and copy the code over from page.php. According to the WordPress template hierarchy, a page-name.php will override page.php.

The original loop we used looked like this:
if ( have_posts() ) : while ( have_posts() ) : the_post();
	// Contents of the Loop
endwhile; endif;
A custom post type loop will look like this:
$custom_query = new WP_Query( $args );
while ($custom_query->have_posts()) : $custom_query->the_post();
  // Contents of the custom Loop
endwhile;
Note that this only a while, and does not have an if or endif.
I’ll have to define the $args or arguments, before the loop.
$args =  array(
	'post_type' => 'my-custom-post',
	'orderby' => 'menu_order',
	'order' => 'ASC'
);
Here I’m defining the post type as my-custom-post, and ordering the posts in ascending order.
So here’s the entire code for page-custom.php.
<?php get_header(); ?>

	<div class="row">
		<div class="col-sm-12">

			<?php
				$args =  array(
					'post_type' => 'my-custom-post',
					'orderby' => 'menu_order',
					'order' => 'ASC'
				);
				 $custom_query = new WP_Query( $args );
            while ($custom_query->have_posts()) : $custom_query->the_post(); ?>

				<div class="blog-post">
					<h2 class="blog-post-title"><a href="<?php the_permalink(); ?>"><?php the_title(); ?></a></h2>
					<?php the_excerpt(); ?>
				</div>

				<?php endwhile; ?>
		</div> <!-- /.col -->
	</div> <!-- /.row -->

	<?php get_footer(); ?>
Now example.com/custom will only pull in posts from the custom post type we created. Right now, the custom post type is set up to only do things that the normal posts can do, but the more you fall down the rabbit hole, the more possibilities you discover.

Conclusion
We covered a lot of ground in this article; you should now be able to…
- Create individual pages for blog posts
- Add pagination to a blog
- Add comments to a blog
- Add WordPress functions
- Enqueue scripts and stylesheets properly
- Have a proper page title
- Create custom global settings
- Create a custom post type
All the source code is on GitHub as always. You can download the code and upload it into your themes folder and see it in action. I might set up a demo if there’s any interest in that.
There is much more that custom post types can do – and much more that WordPress can do, as well. I haven’t touched on the theme customizer, which is the most current way of creating themes.